By signcraft
Posted on Monday, November 17th, 2025

They say necessity is the mother of invention, and necessity is what pushed Dayna Reed to put this jig together to speed the installation of signs and letters. Faced with installing all the interior signage—room numbers, wayfinding signs, etc.— in the newly renovated historic Lightwell Hotel and Spa in Hood River, Oregon, he knew he had to handle it as efficiently as possible.
He wanted a jig that would let him place the jig against the door trim to the left of the door then quickly level the sign at the desired height. Then he could pull the liner from the double-sided tape on the back of the sign and adhere it to the wall. The bottom of the sign would be level.
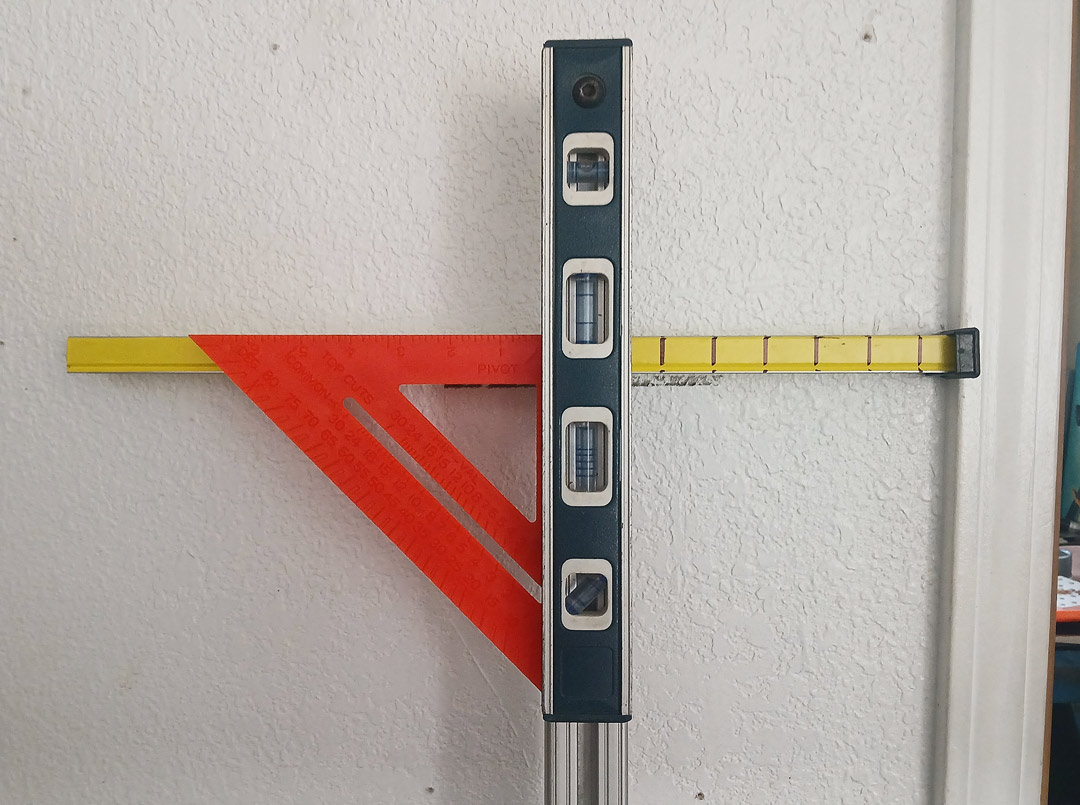
He began by making a prototype to work out the details, using a plastic speed square, yardstick and a 4-ft. wood ruler. He attached a short piece of 1×2 to one end of the 4-ft. ruler with double-sided foam tape so that it could serve as a guide on the floor. Then he attached the speed square and yardstick the same way, so the top of the yardstick would be 42 inches off the floor, which was the height of the room numbers.
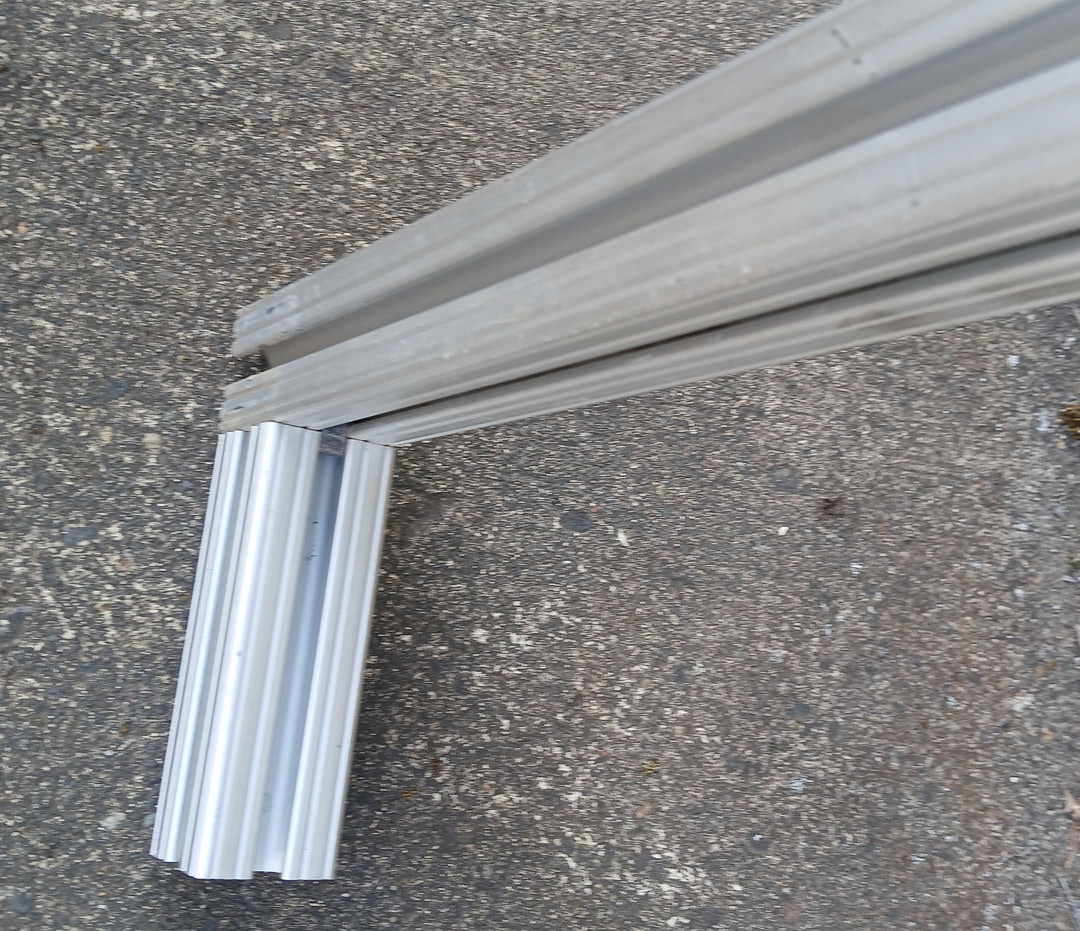
It worked fine, though it wasn’t as rugged or as adjustable as he needed given the number of signs to install. He built a second version using a 68-in.-long piece of square aluminum extrusion. He fastened a short length of the same extrusion to one end of the long extrusion to serve as a “foot” on the ground.
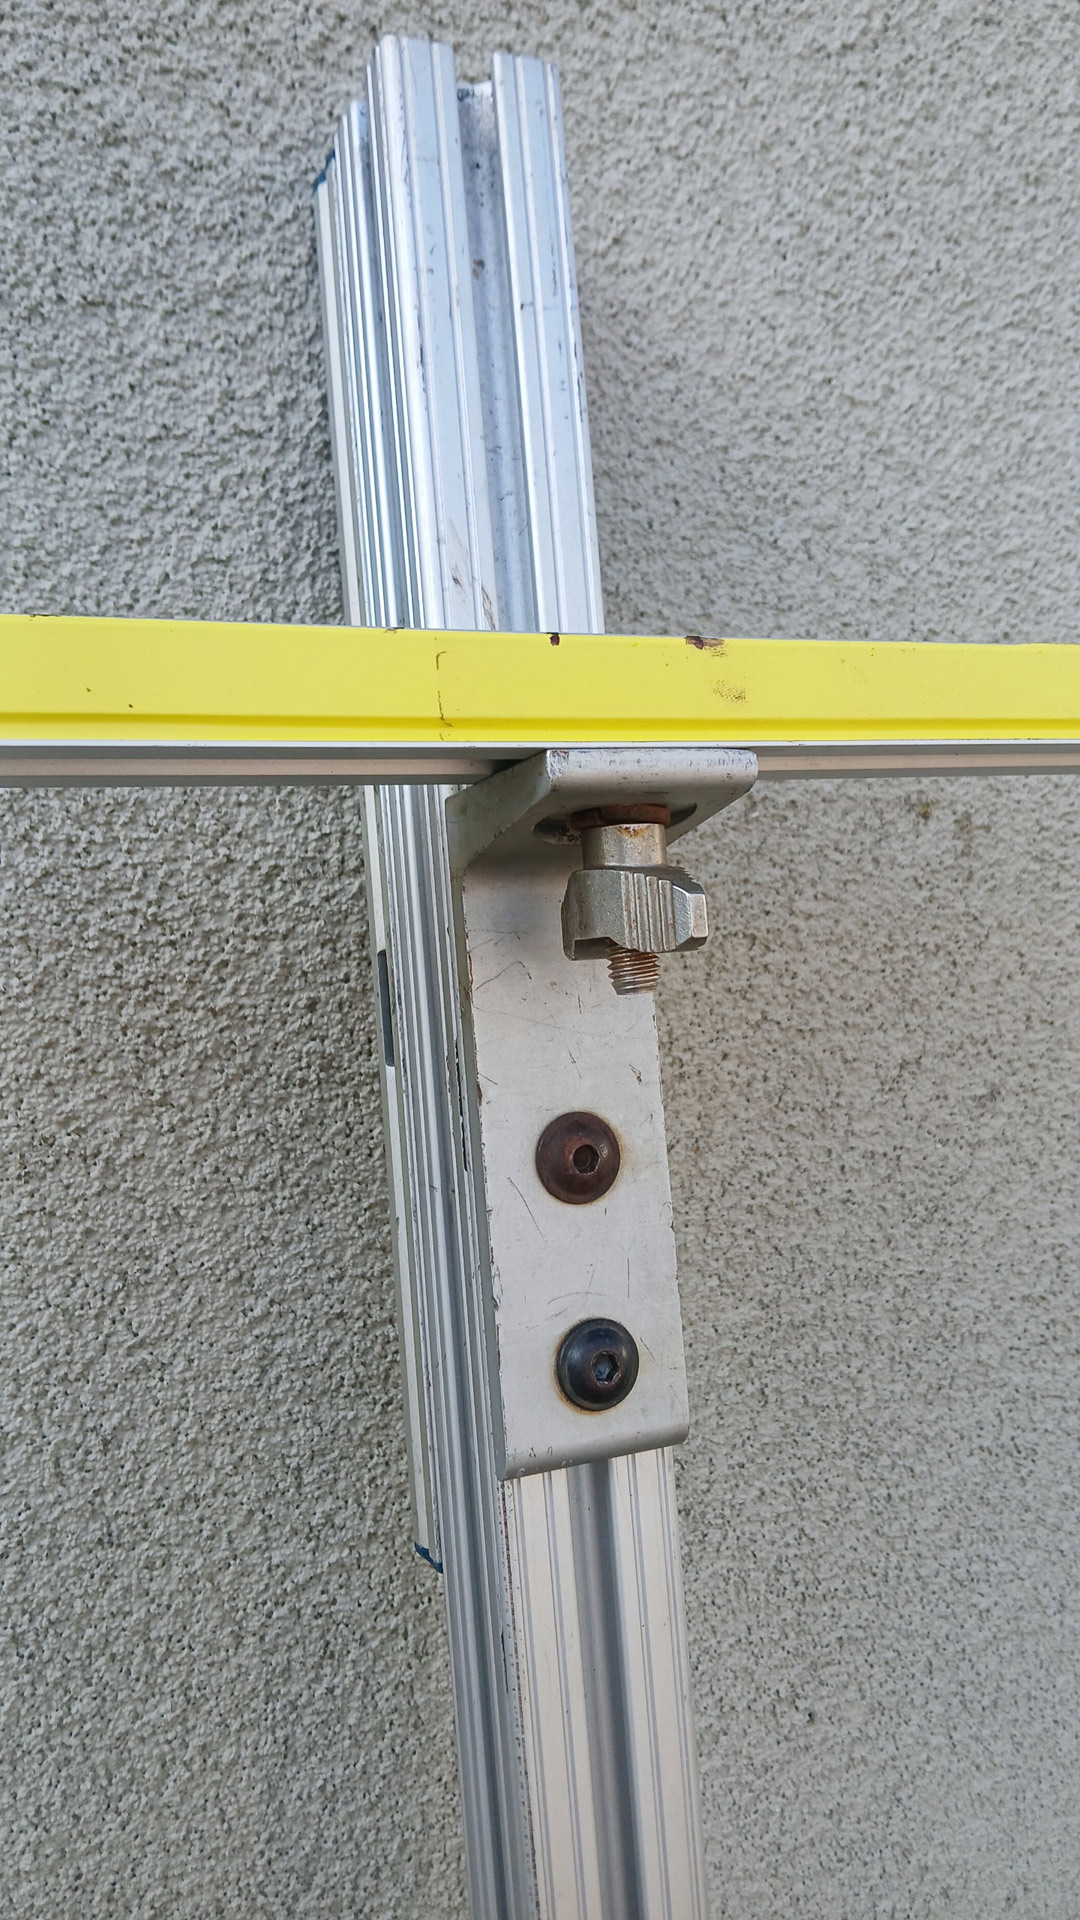
On the other end of that extrusion, he mounted an angle bracket that he drilled to accept a bolt that went through a horizontal bar. The horizontal bar would support the sign while mounting it. It rests on the speed square so that it stays square with the extrusion. A wing nut on the bolt made it easy to adjust that bar left and right so that Dayna could set the distance from the door trim and have enough room to mount the sign.
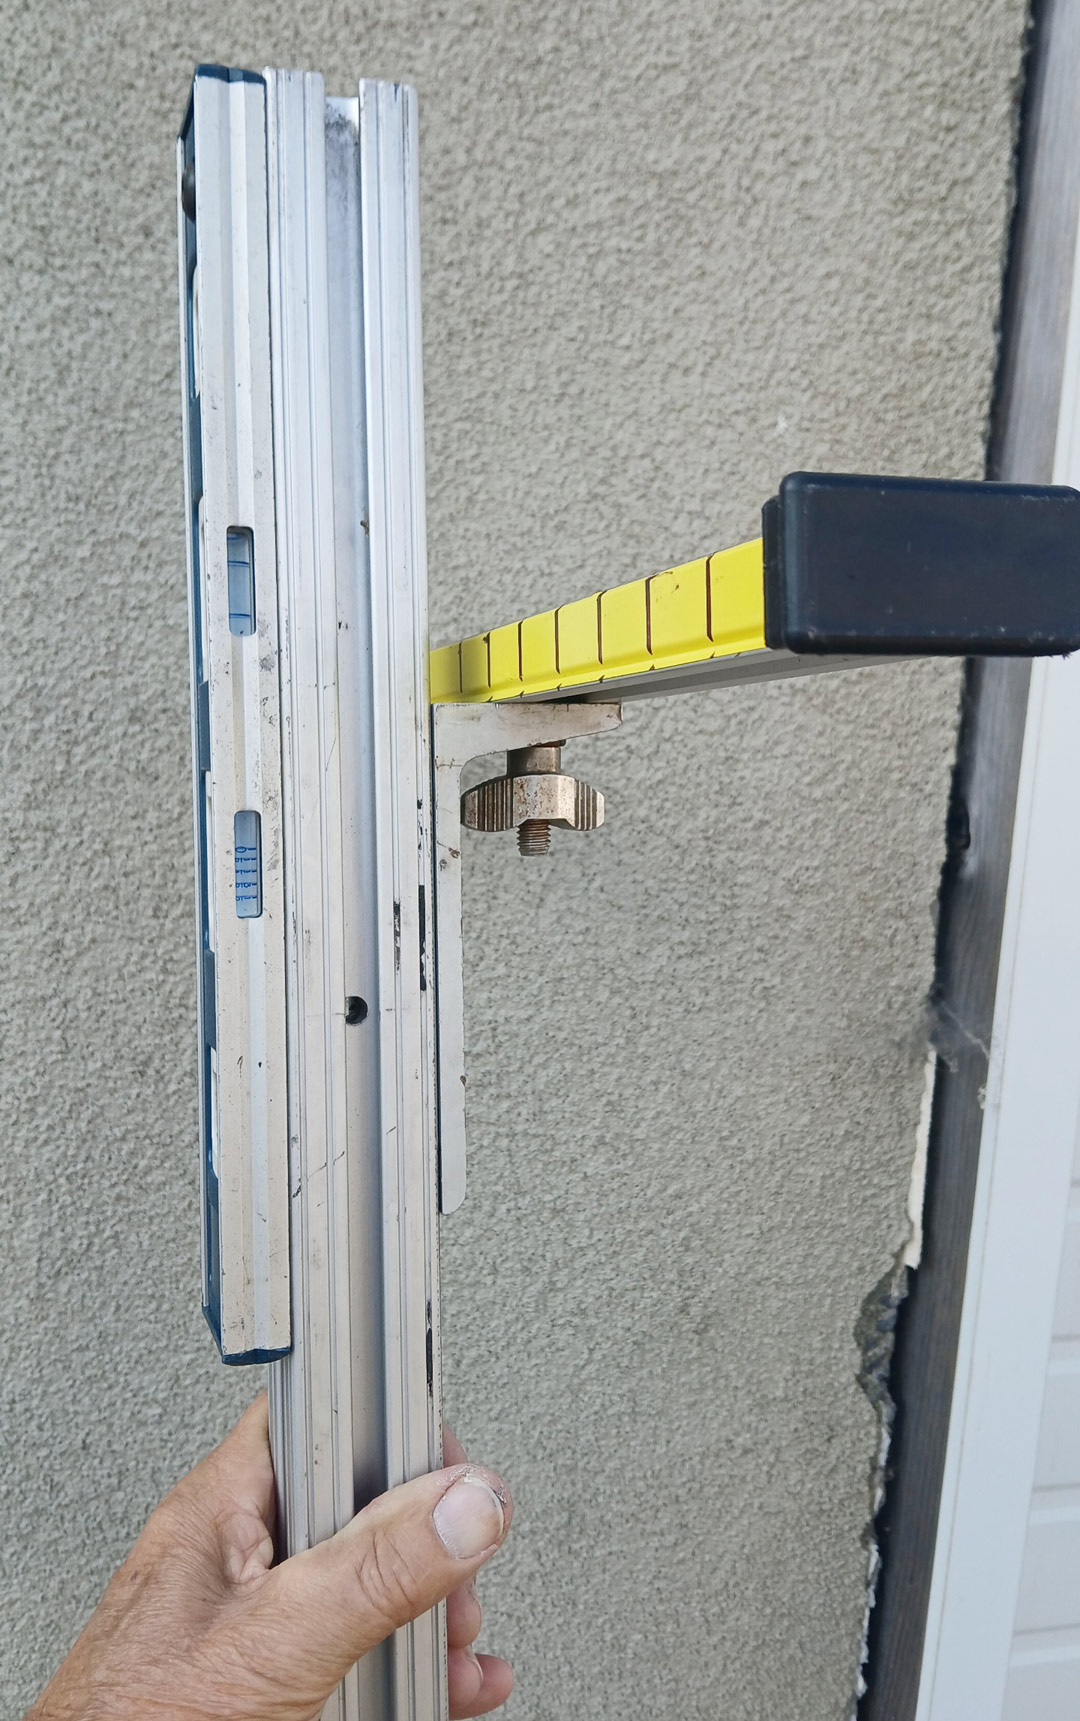
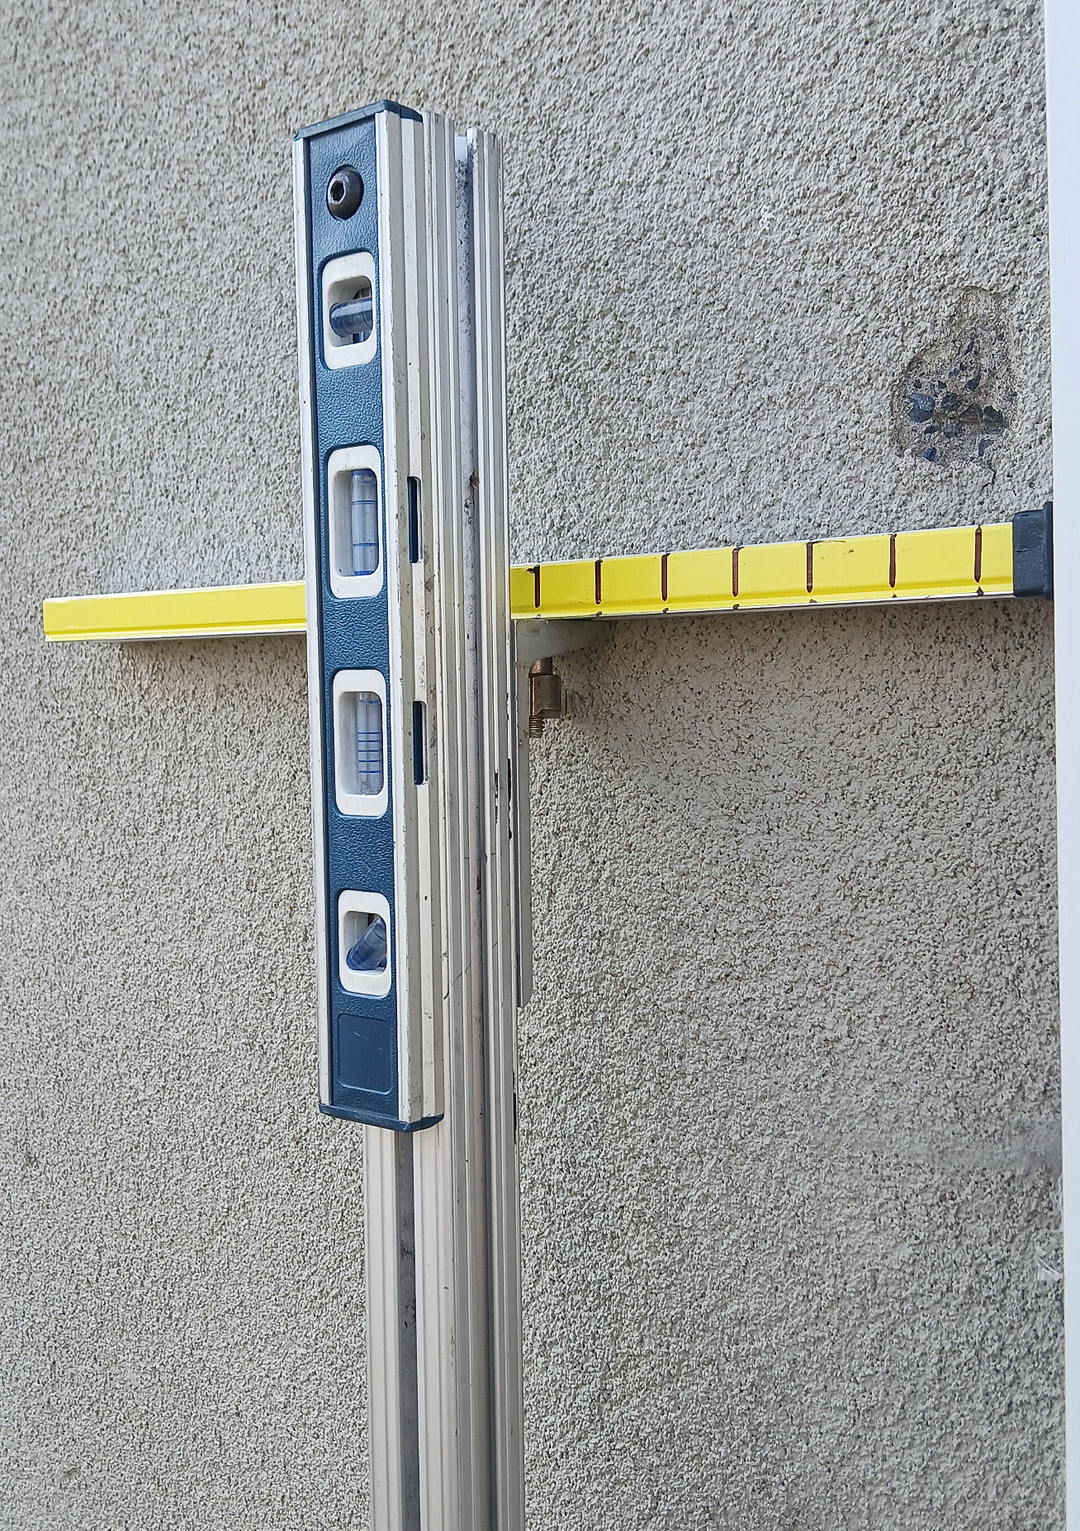
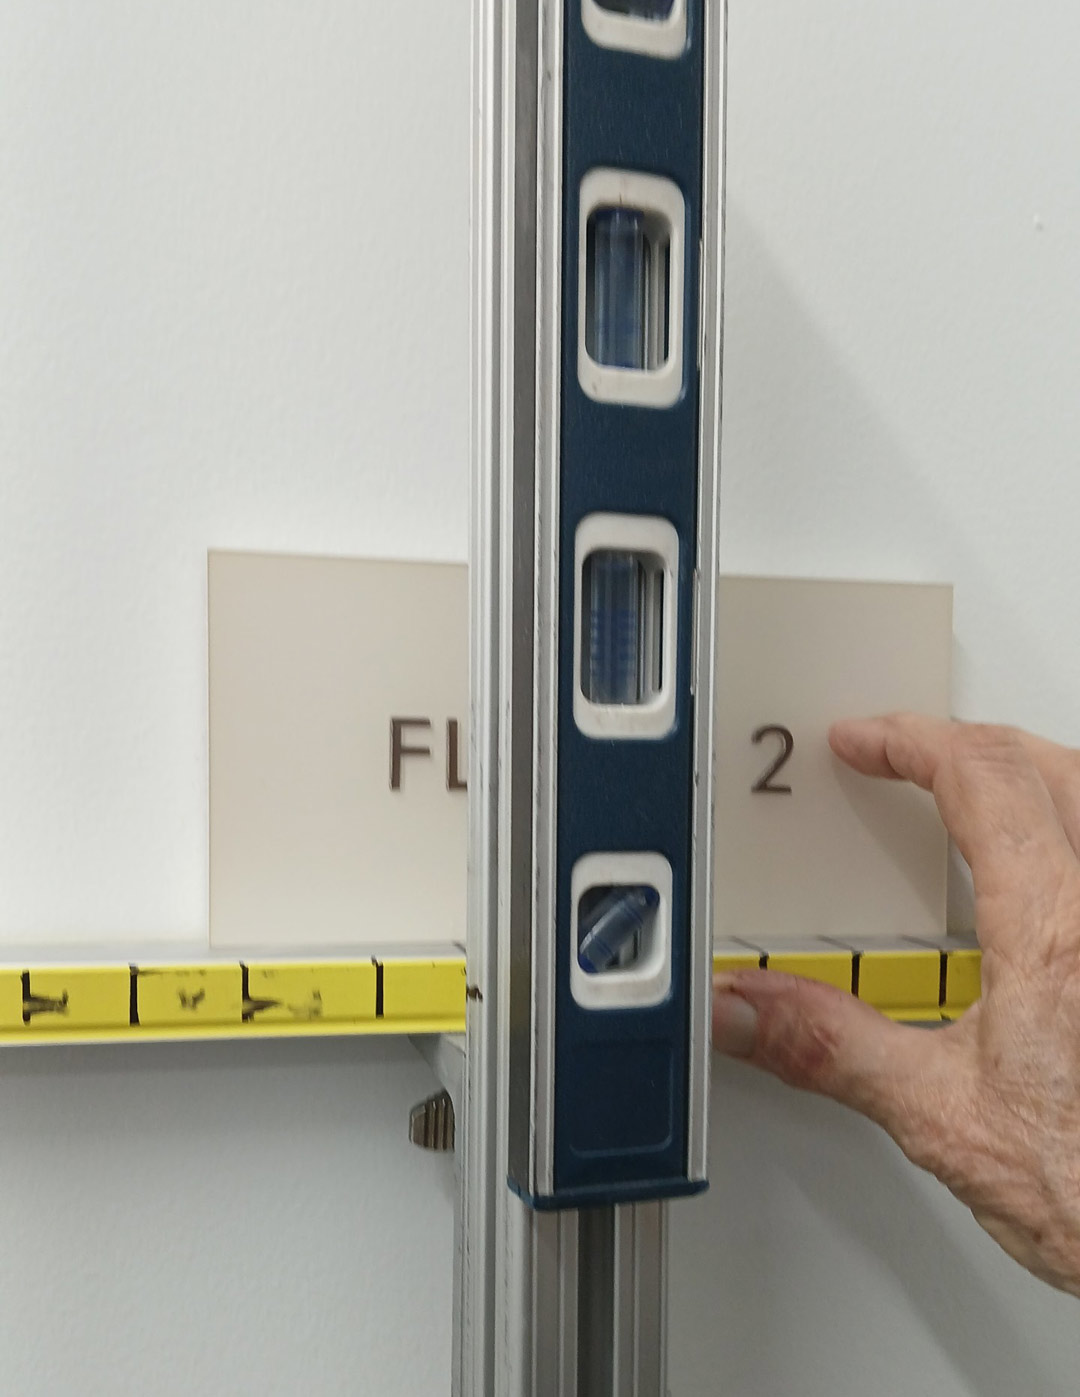
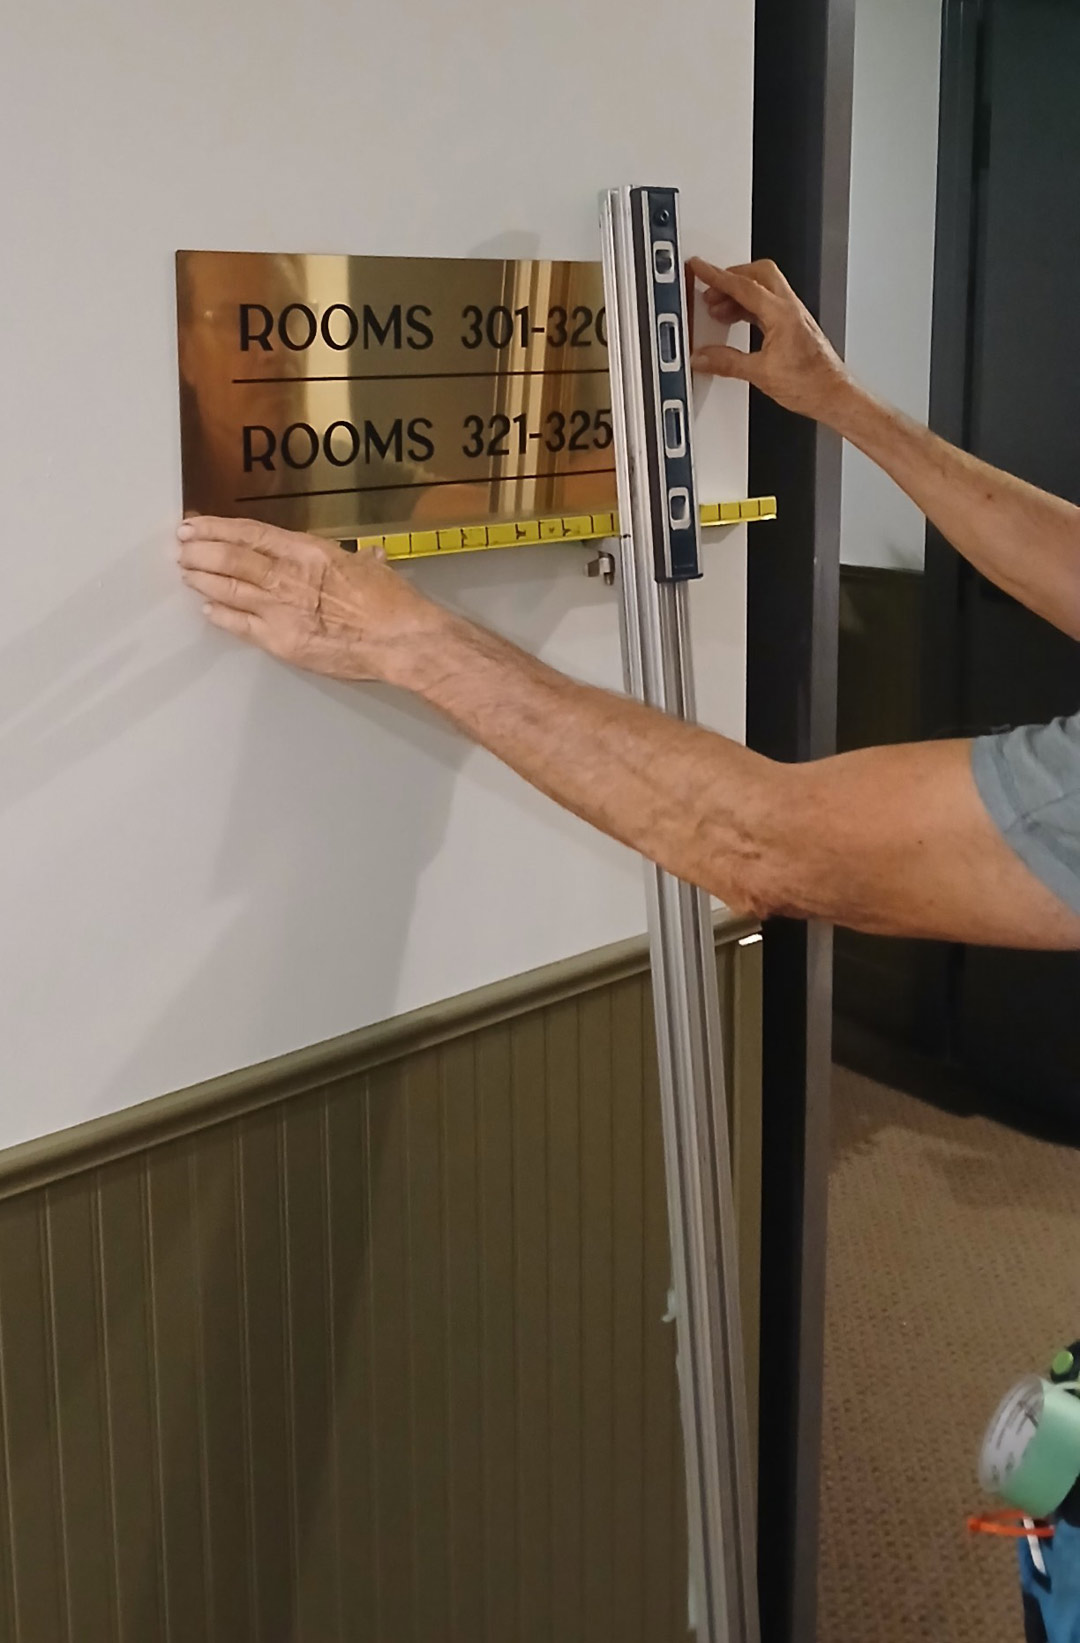 He mounted a level to the vertical aluminum tubing. Since the horizontal bar was square with the vertical tube, he could simply make sure that tube was level then the horizontal bar was level as well. The bottom of the sign he was installing would rest on the horizontal bar while he did the installation using VHB tape.
“When you’re working on very expensive wall coverings,” says Dayna, “you don’t want to risk a mistake. Getting the VHB tape off the wall without damaging it would be impossible. It’s an old building, and none of the floors or ceilings were level, so you couldn’t measure from either of them then just install the sign.
“The jig let me quickly get the sign level without involving the floor or ceiling. I set the tri-square on the jig and against the door frame to make sure it was right. The eye relates square to the door frame not the ceiling or floor. I discovered that I didn’t need the level that I mounted to the vertical extrusion. I simply set the tri-square on the jig, slid it to the door frame and adjusted the jig with my foot left or right to make it square.”
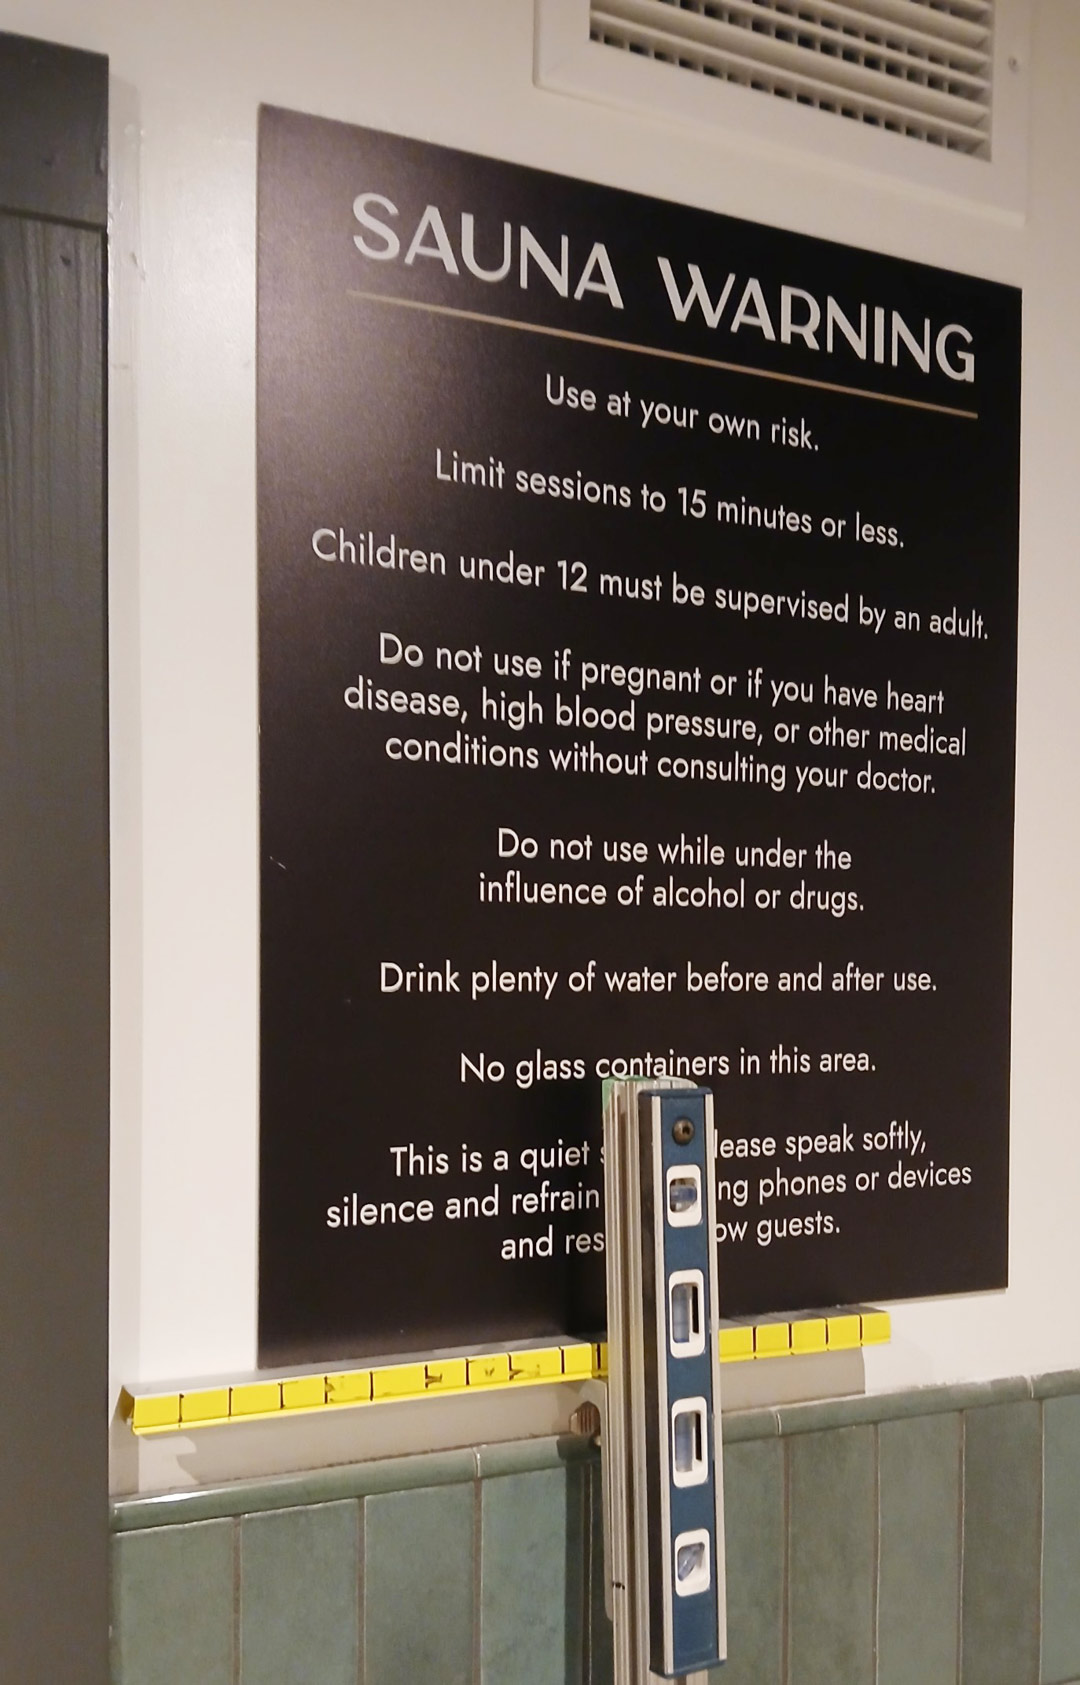
The 3-by-5-in. signs for the room numbers were installed with two large strips of VHB tape. There were several large signs, 3-by-3-ft. and 4-by-4-ft., that he installed with silicone adhesive as well as VHB tape. They were installed using the jig as well.
“It saved me a lot of time,” Dayna says, “and I can think of many times in the past that having a simple jig like this would have made installing signs or individual letters faster and easier.”
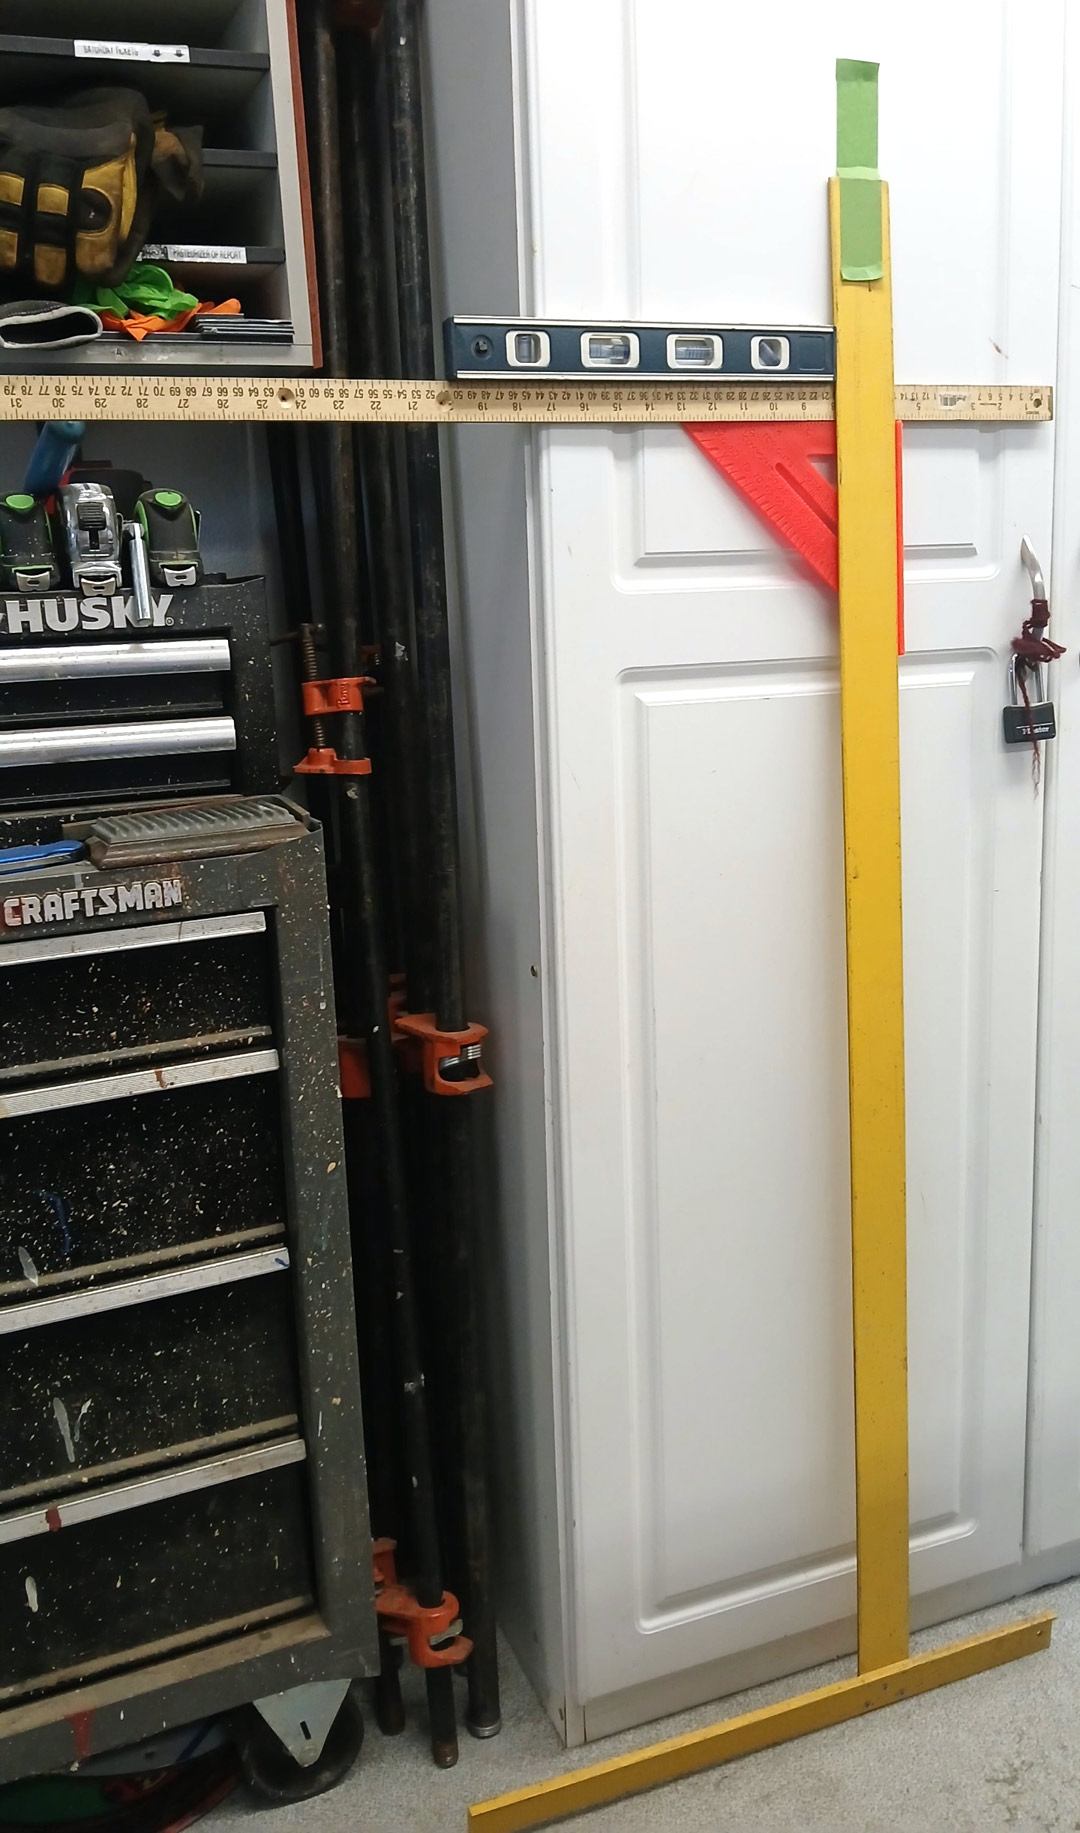
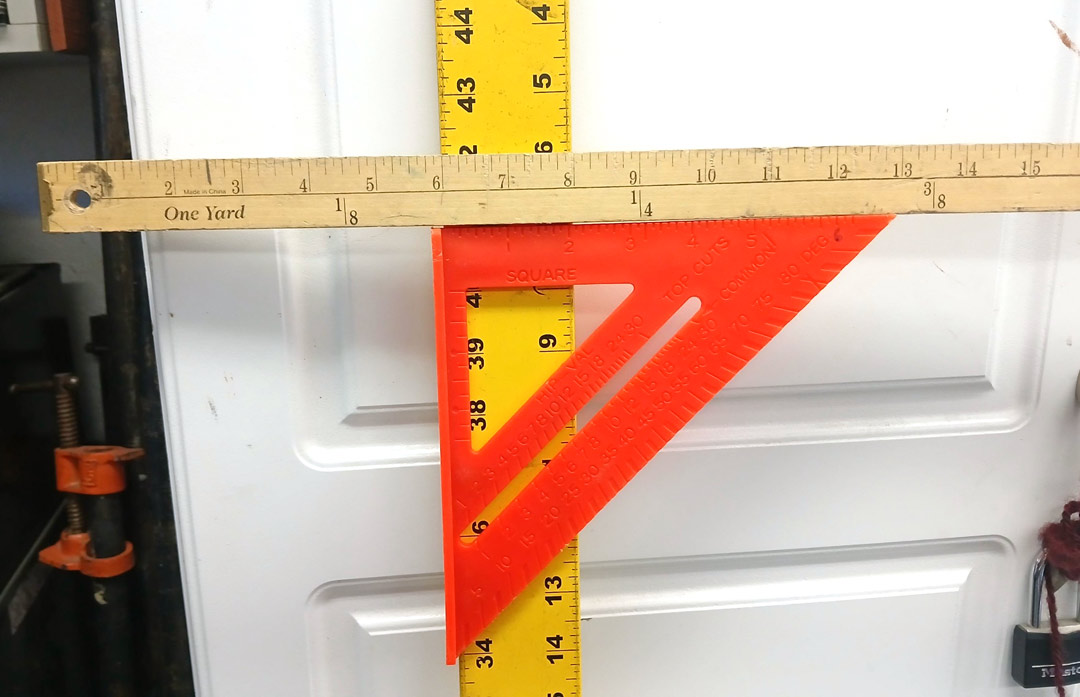
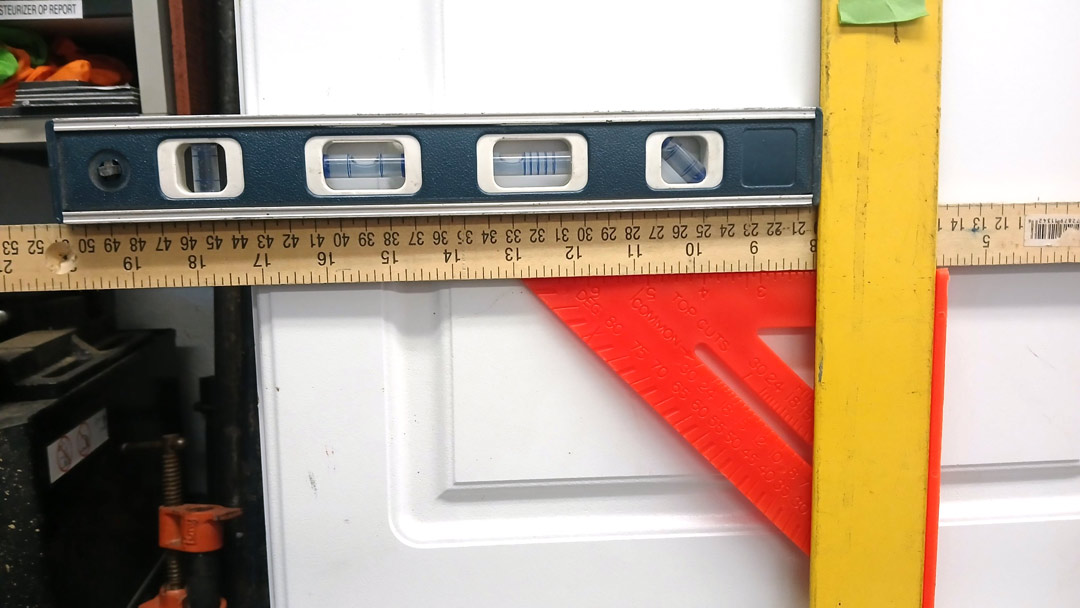
“The three photos above show the prototype,” says Dayna. “It worked fine, but I wanted a sturdier version, so I built one using aluminum extrusion.”
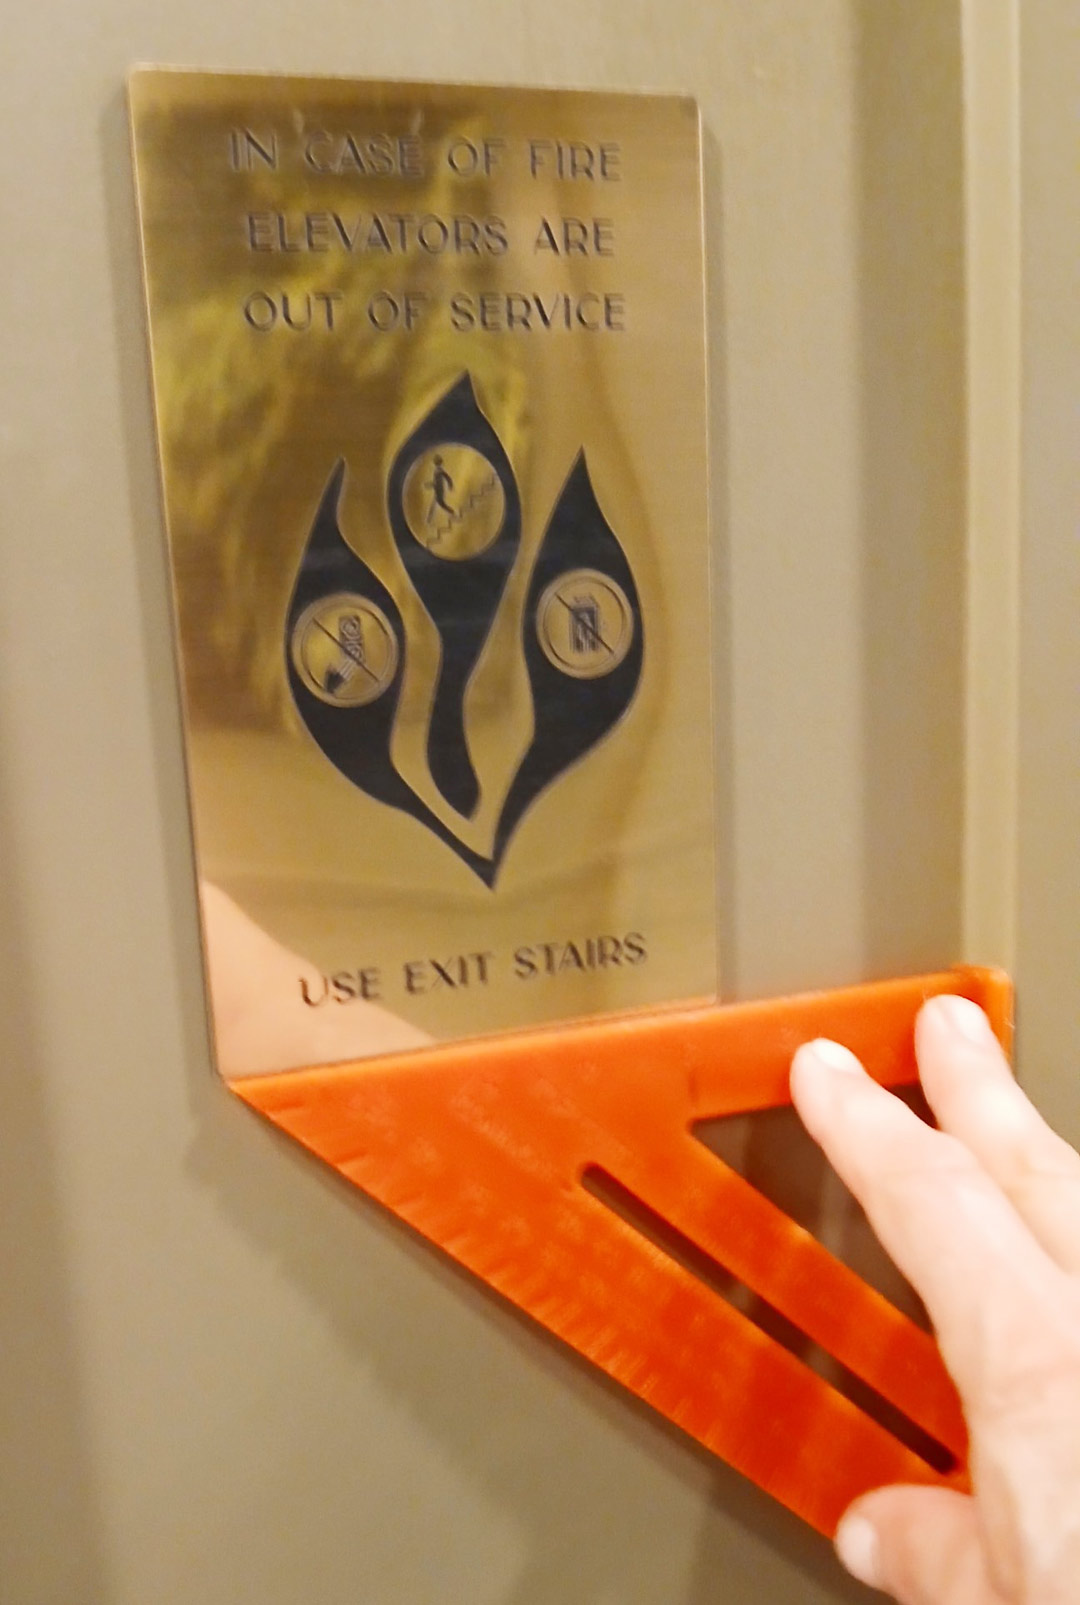
Small signs that were close to the door frame were mounted using just a plastic speed square.
