By signcraft
Posted on Monday, December 1st, 2025

Traditionally, one easy way for a sign painter to pick up holiday cash was to paint Christmas window splashes all over town. It still works. They’re fast, easy and fun–and if you like working with paint, they’re a great way to work on your layout skills.
They can be an easy sell, too. Businesses like them because it pulls eyes to their storefront. Depending on the community, no permit is required since they may be considered Christmas decorations (even if you do mention “Holiday Specials”).
Dayna Reed, Hood River, Oregon, has been painting window splashes for his entire 40-plus years as a sign painter.
“Back in the ’80s and ’90s,” he says, “I did a lot of them. I got my technique down and got faster. For example, I glued two 6-by-9-in. sponges together then cut them into the shape of a holly leaf. I backed them up with a piece of aluminum and mounted a handle on it. I would daub the sponge on a palette that had dark green and lime green tempera on it, then press it on the glass. It looked great and I used it for years.”
Everything about a Christmas window is about fast, easy production. It keeps the cost in line for the customer and profits high for the sign painter. You need a setup that keeps everything at your fingertips.
There’s little time to spend on doing a tight layout so there’s minimal (or no!) measurement or drawing out letters. You want the layout to look festive and fun, so casual and script letter styles help deliver that. Everything about doing a Christmas window is fast and loose.
Errors are part of the process, so you get good at hiding all but the largest ones. “On a Christmas window,” Dayna says, “you just paint over every drip or stray stroke with a snowflake or some holly or whatever.”
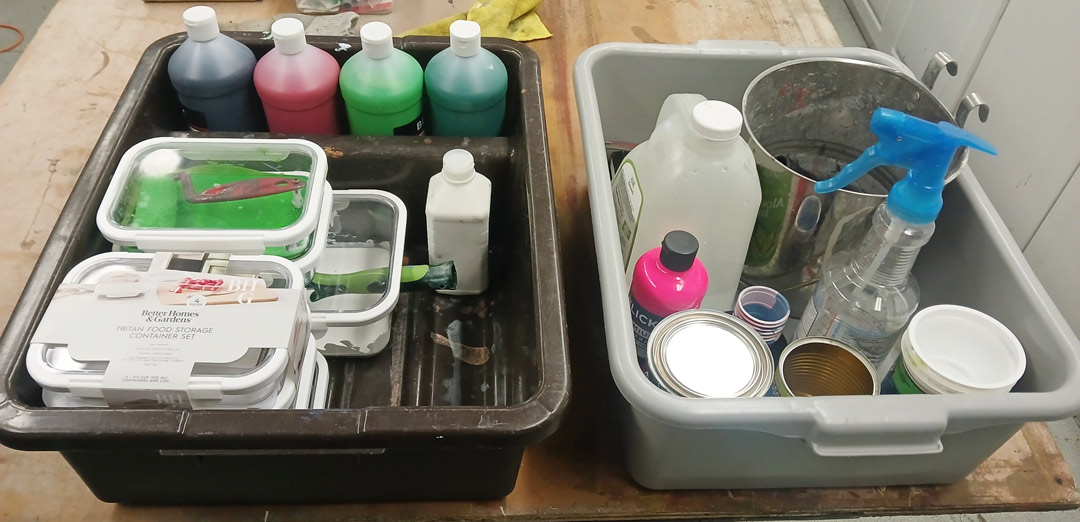
For Dayna, everything he needs fits in these two bins. In the left bin there are four quart squirt bottles of Dick Blick Premium Tempera. The white bottle is an isopropyl alcohol squirt bottle filled with white exterior acrylic paint. Tempera doesn’t cover well on glass—it’s translucent. So you need to lay down a base coat of white wherever you plan to use tempera.
The six food storage containers serve as both roller tray and paint storage for the five colors plus a larger one for the white exterior acrylic paint that Dayna uses for the base coat. Interior acrylic paint will work, too.
In the gray bin, he has a gallon of water, a wash pot, a spare bottle of tempera, a quart of white exterior acrylic paint in a metal can, mixing containers and a spray bottle of water.
“I use that to thin the black and white paint as I work,” he says. “I also spray a little water on the roller and paint before I snap on the lid when I’m done with the job. That thin coat of water keeps everything from drying out. Incredibly, they stay soft in those sealed containers for months.”
Dayna’s approach to Christmas window layout is simple: a clean, energetic message and some simple graphics that he calls “garnish.” To keep time to a minimum, he doesn’t add characters or complex artwork.
“When I approach a business about a Christmas window,” he says, “the customer sometimes asks about Santa or snowmen or other characters. I explain that I’d love to, but this year I’m only set up to give you perfect lettering with beautiful holly, berries and snowflakes.
“Characters take a long time to paint and you have to carry more colors like flesh tones and shades of gray. It’s easy to get caught up painting cool characters and it’s hard to get paid for all that time. I’d rather walk away from a job where they insisted on characters and go on to one that I can knock out the lettering and a bit of artwork in two or three hours.”
Dayna also focuses on selling large windows. He says he doesn’t bother with small windows because they crowd the layout and they don’t have near as much impact. And the folks with big windows usually have bigger budgets, too.
The cost of materials and the setup are minimal. Dayna spent about $150 for supplies for the windows this year. Two quarts of each color of tempera cost about $100 including shipping. The white exterior acrylic paint, rollers and miscellaneous things were about $50. A large window like this sells for $400, and he was done in less than 4 hours.
Here’s how Dayna explains his process:
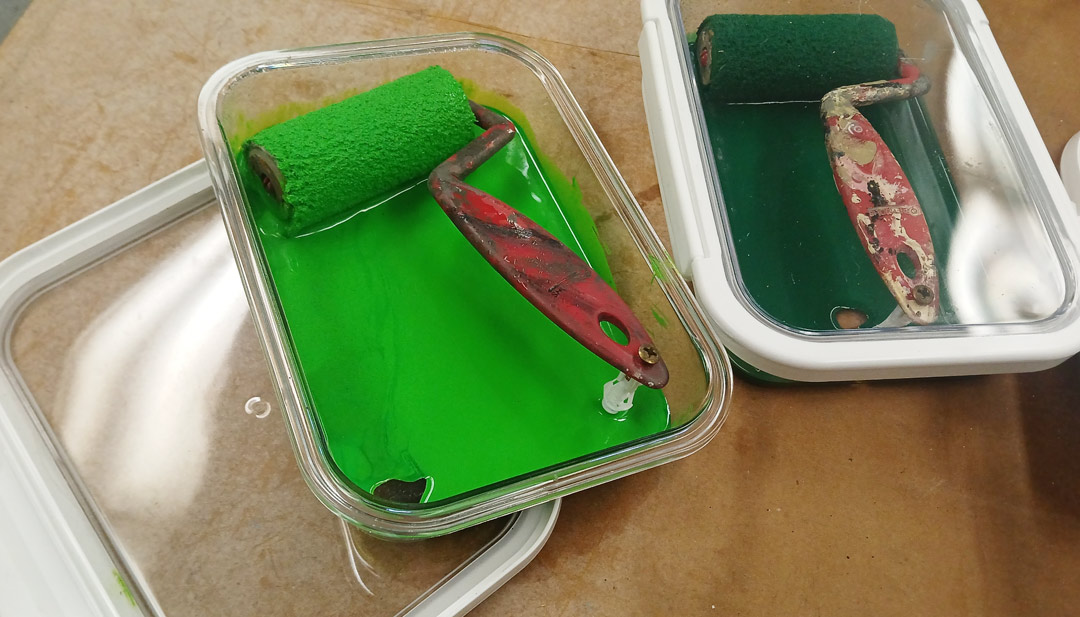
“I put the tempera on with 3-in. ShureLine rollers. They used to be available in almost every hardware and paint store, but they are a little harder to get lately. I put the roller in the container with about ½-in. of tempera. I put a screw through each handle into a plastic wall anchor to serve as a stand that keeps the roller handle out of the paint.”
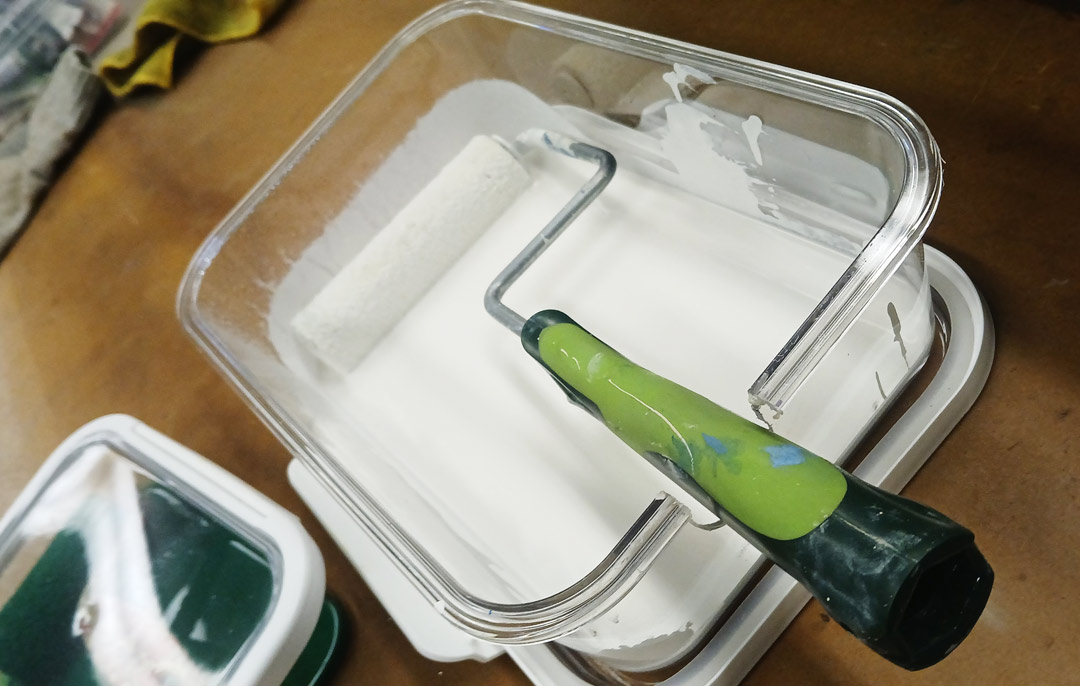
“I use a larger 4-in. roller to lay down the white base coat. I needed a larger plastic storage bin to hold that. The roller is longer than the storage bin, so I used a hole saw to notch the bin to accommodate the handle. Even with the hole in the container, the paint and roller are fine for weeks and weeks if you spritz it all off with water before you close it.”
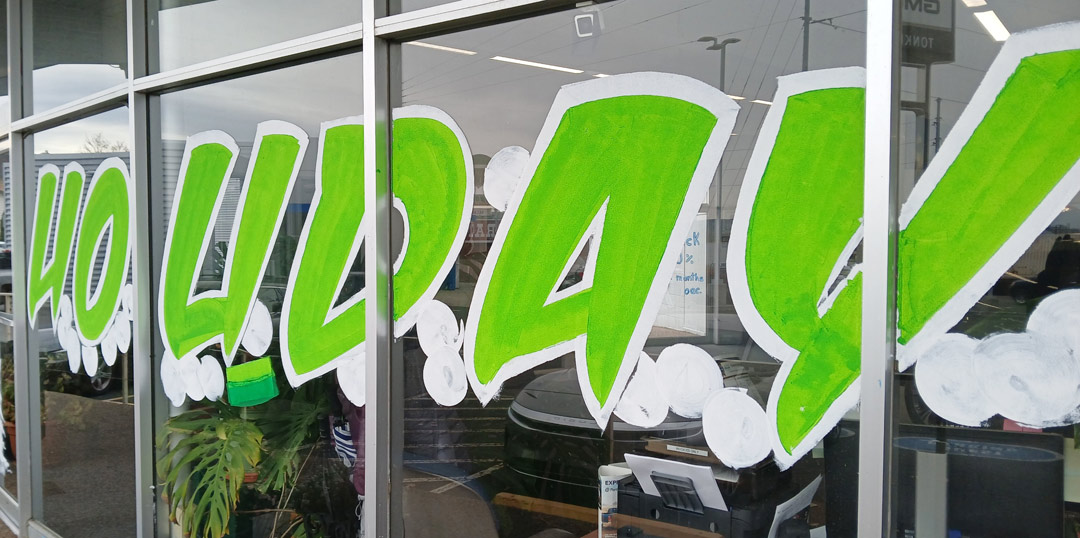
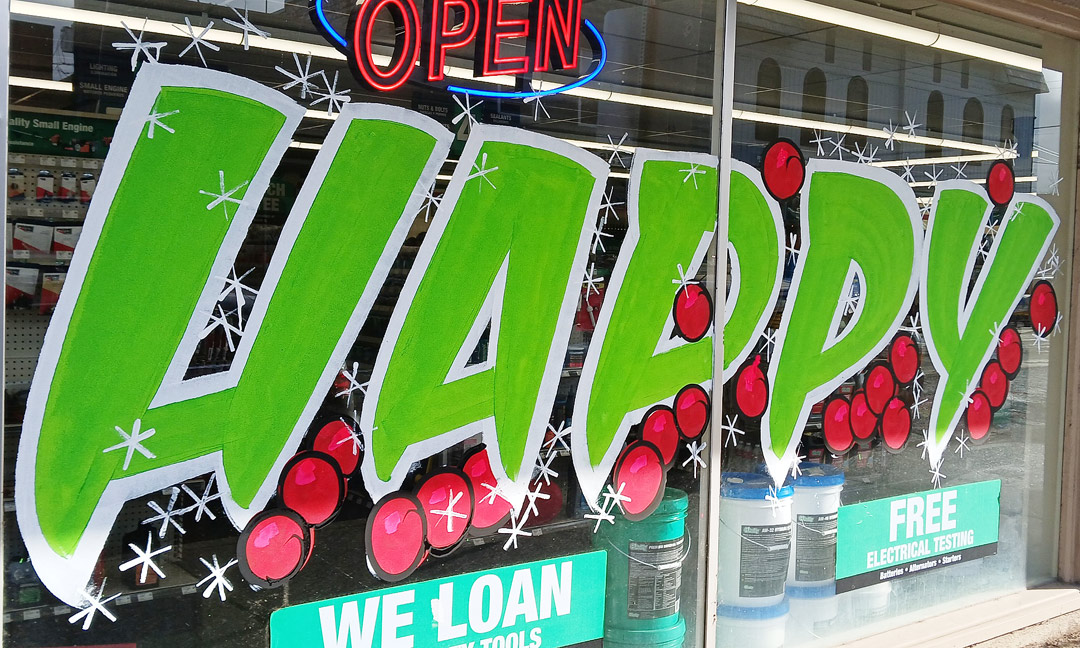
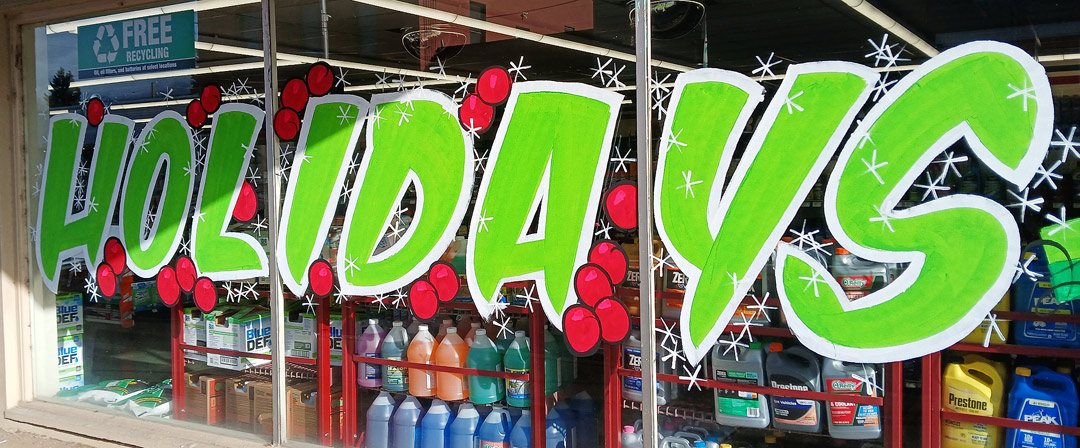
“I don’t do a layout on the glass, but you could if you needed it. Here I have applied the green tempera over the white exterior acrylic base that was done with the 4-in. roller. That’s sort of my signature Christmas window letter style. It’s just a casual that I can do easily with a roller.
“The balls were the base coat for the red berries. Almost everything is done with a roller—brushes will slow you down. The white base included the outline, and it dried very fast. By the time I finished the last letter, the first letter was almost ready for the green.”
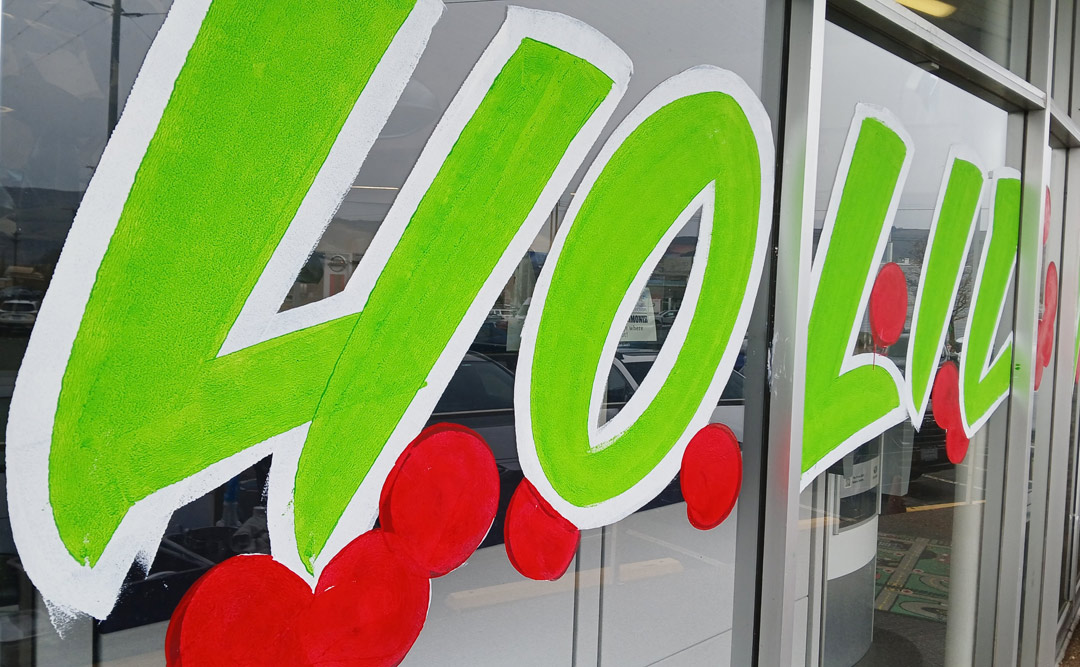
“Once the green letters were done, I came back with the red tempera to do the berries.”
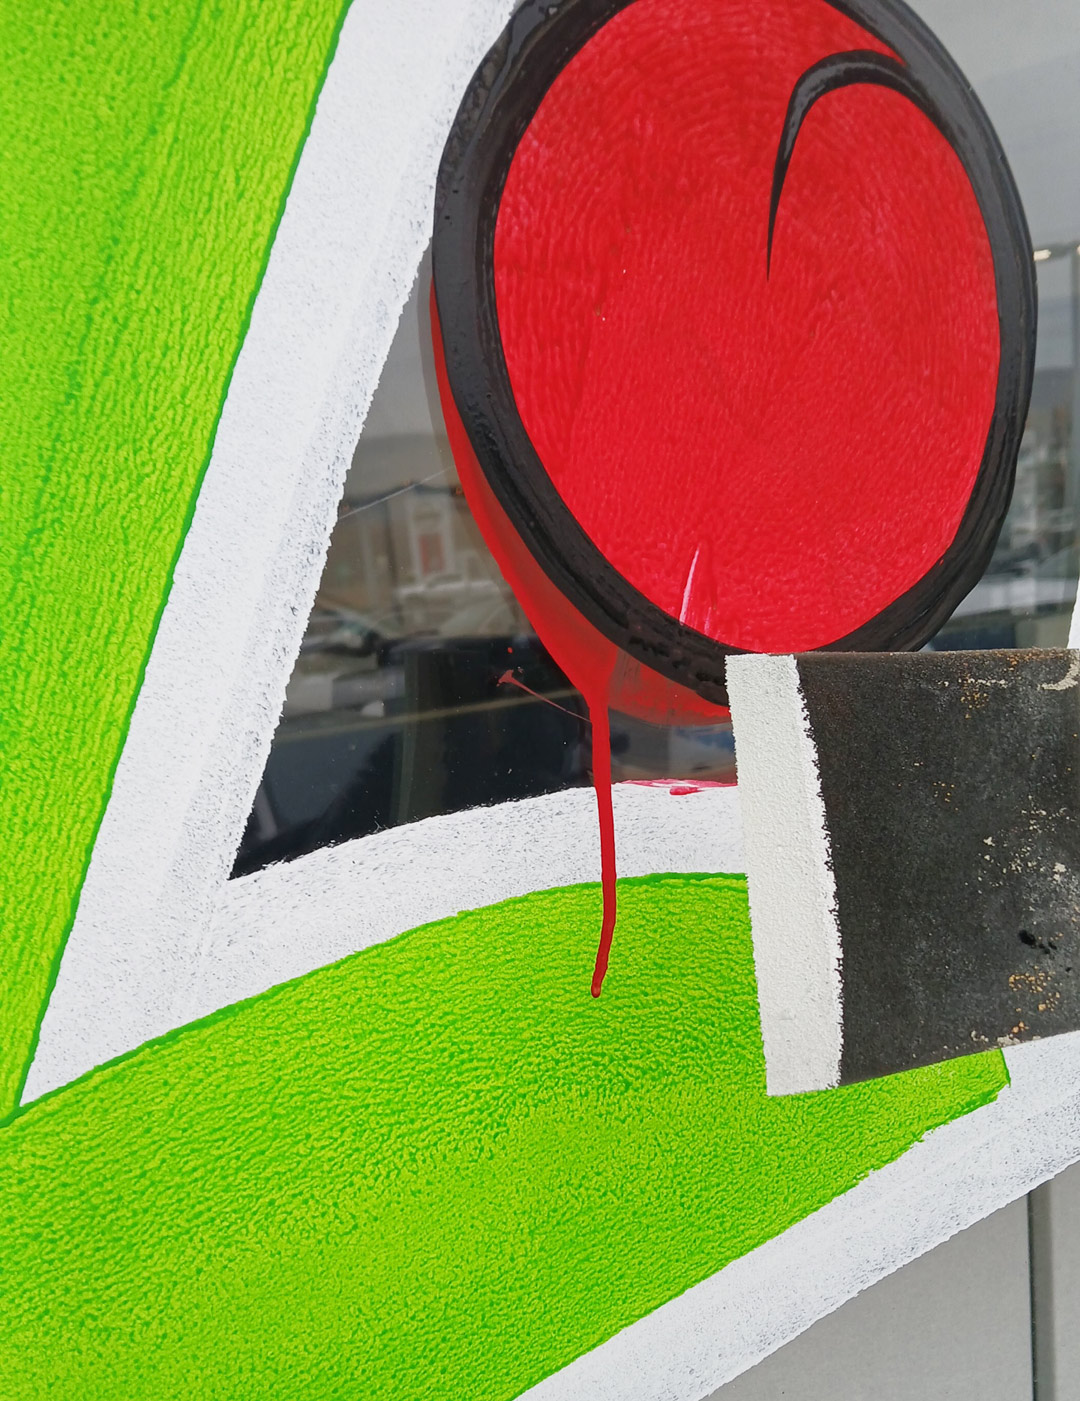
“The black outlines on the berries were done with a liner brush and thinned black tempera. Here’s a drip of red paint that needs fixed. I’m about to hide it with a foam brush and some white paint.”
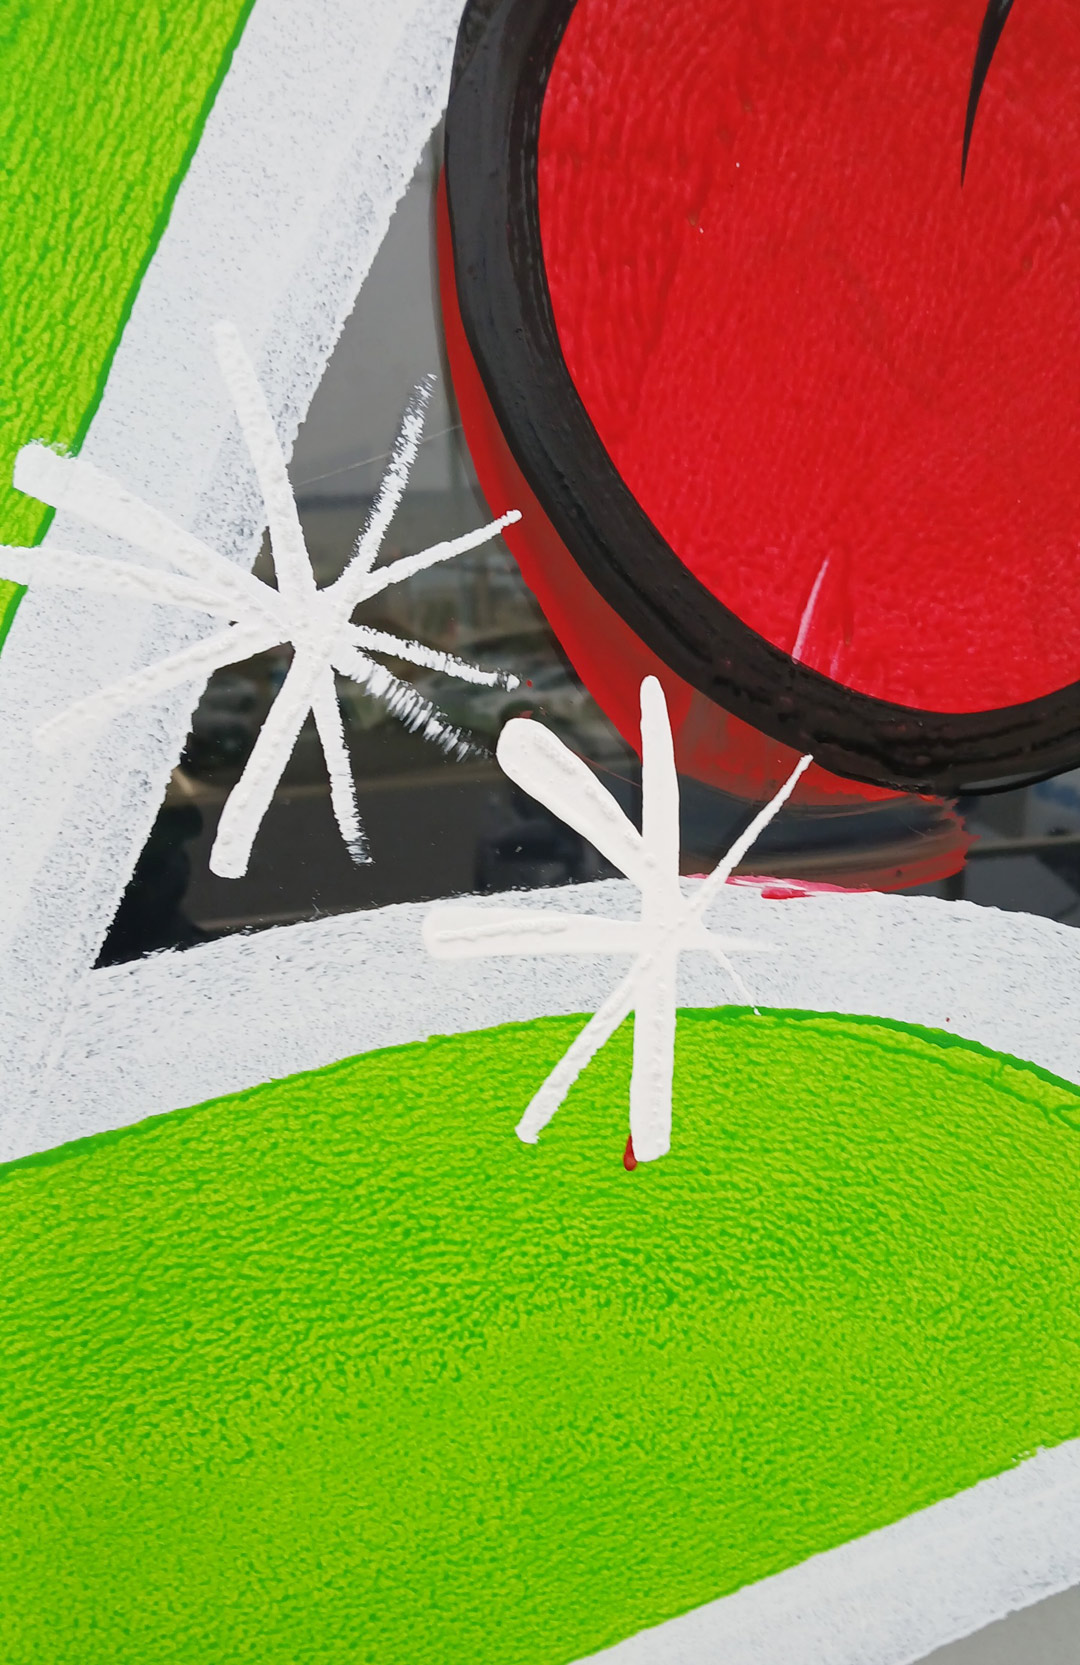
“The snowflake did the trick. This was the first Christmas window I’ve done since COVID, and I was pretty rusty. There are a lot of mistakes here! So what—you just hide them with berries or snowflakes or whatever. Just keep moving—remember these are very temporary graphics. There’s no need for perfection.”
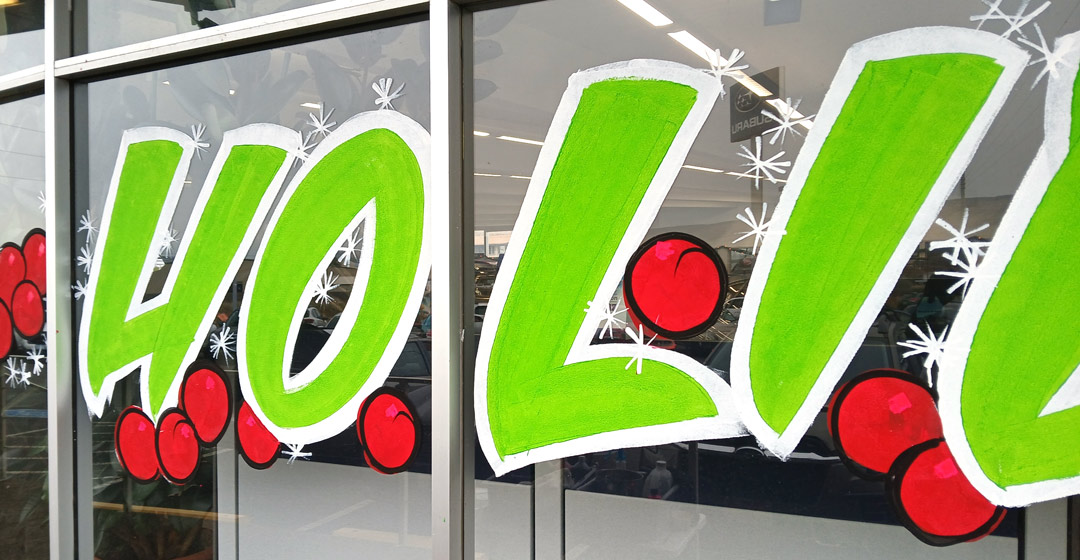
“Here’s a section of the finished lettering.”
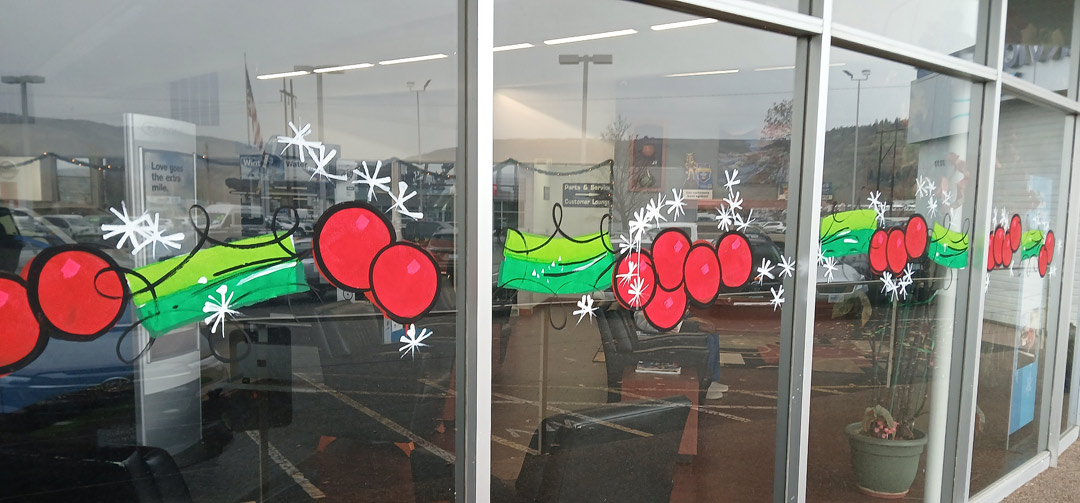
“Along with the lettering, I added some quick holly graphics to fill up the space.”
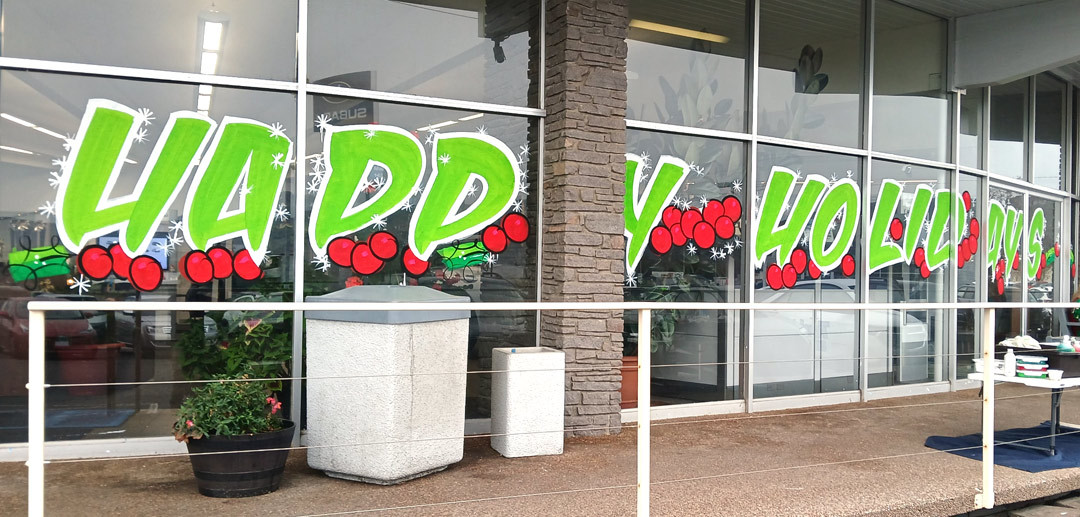
“The window was complete In a few hours, and it was on to the next one…”