By signcraft
Posted on Monday, March 10th, 2025

I made this 3½-by-9-ft. single-faced sign for a small condominium in the early 1990s. It was one of the earliest signs that I made when I first got into the sign business. It was originally fabricated completely from solid redwood—the sign face, the background and the layers that simulate a gorge. The condo owners still find the design effective and appealing, and the sign has held up pretty well over the years.

Showing its age after 35 years
But recently the elements had caught up with it—and it wasn’t the first time. Back in 2005, the weather had caused the sign face and redwood letters to crack and fail. I replaced the circular face and raised letters with HDU board. The rest of the mounting was all left in natural bleached redwood.
The round face was cut and routed on the CNC router. The texture of the sun’s rays was hand carved using a half-round gouge. The faces of the letters were dimpled using a Dremel Moto-Tool hand grinder.
It was finished with two coats of Ronan Aquacote water-based sign enamel. I began using that finish after reading Gary Anderson’s article in SignCraft on using water-based paints for sign work, “Jump in—the water’s fine”. The sun panel is gold Ronan Aquacote, the sun’s rays are Ronan AquaCote Metallic Copper and the letter faces are Metallic Silver.
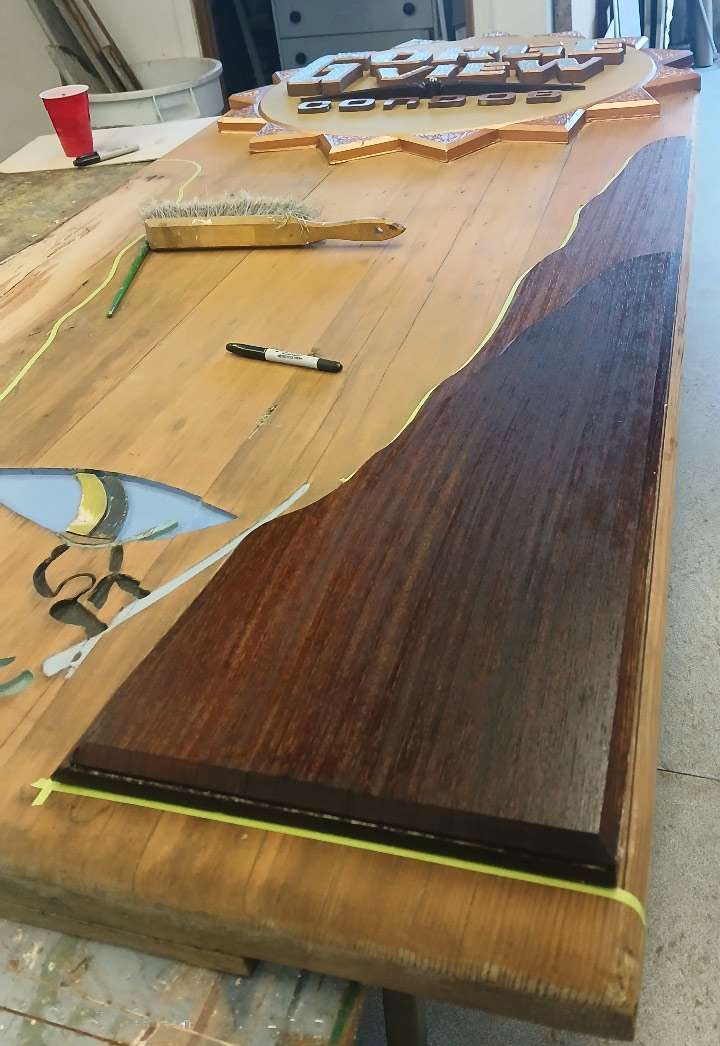
This year, 20 years since the previous upgrade, I refinished the entire sign. I took it to the shop and removed the rotting redwood layers of the gorge graphic. The 35-year-old redwood planks that make up the sign’s background were still in good shape, so I just cleaned and sanded them.
The two layers of wood that made up the gorge graphic were beyond repair. I replaced them with two layers of a very dense tropical hardwood that had been lying around my shop for years. The planks were ½-by-15-in. and were 9 feet long. I don’t remember the rather exotic name of the wood, but I can promise that it is extremely hard.
I used the old panels as templates for the new ones, cut them to shape, then finished them with linseed oil. I dry fit them on the background and taped the perimeter carefully with fine line tape. I was using Gorilla Glue to bond them to the redwood background, and the tape would catch any glue that might seep out around the edges.
I spritzed a little water onto the surface of the redwood background and applied the glue. I positioned the prefinished panels, then weighted them for a couple of hours. The small windsurfer graphic at the bottom of the sign, which they had asked me to add to the design when I first designed it, was sanded and repainted.
I refinished the sign face without removing it from the background. I had bonded it to the redwood plank background with either Gorilla Glue or silicone when I replaced the original redwood face with HDU in 2005.
The letters were cleaned and sanded, then finished with the same Ronan Aquacote paints that I had used 20 years ago. The small panel with the phone number was done with vinyl graphics on a painted ACM panel, mounted on standoffs.
Once it was reinstalled, the sign was ready for another 15 to 20 years of faithful service. I can’t promise that I’ll be available when it’s time for the next restoration, though.
Dayna Reed lives in Hood River, Oregon. He is author of two DVDs, 3D Signs Made Easy and More Super Cool 3D Signs, are available at SignCraft.com. Save $20 when you buy both.