By Perry Yaremchuk
Posted on Monday, April 21st, 2025

I started screen printing in 1984, and apprenticed in a sign shop in 1986, where I learned hand lettering and myriad other skills. After working in numerous commercial and custom sign shops, the last 20 years have been with the Traffic Operations Sign Shop here in Kelowna, British Columbia, Canada. Along with all the traffic signs, we also produce graphics and signage for municipal buildings, community events, parks, fleet and construction, plus the usual mix of work typical of a commercial shop. There are two full-time “sign technicians,” and we occasionally add a helper during the busy summer season.
Over the years, we’ve been attached to the Traffic Department, Civic Properties, and then last year back under the Traffic Operations. The latest move gave us a chance to reorganize the workspace and make some improvements.
I guess moving our household about 10 times taught us a few things about packing, organizing, labelling, and our friends’ fave pizza and brewskis, but somehow moving a sign shop seems daunting by comparison! It was our second shop move in the past ten years.
After adding new equipment, new staff and accommodations during COVID, it seemed that I was always shuffling and building and rearranging things. It was time to move and set up a workspace that was compact and efficient.
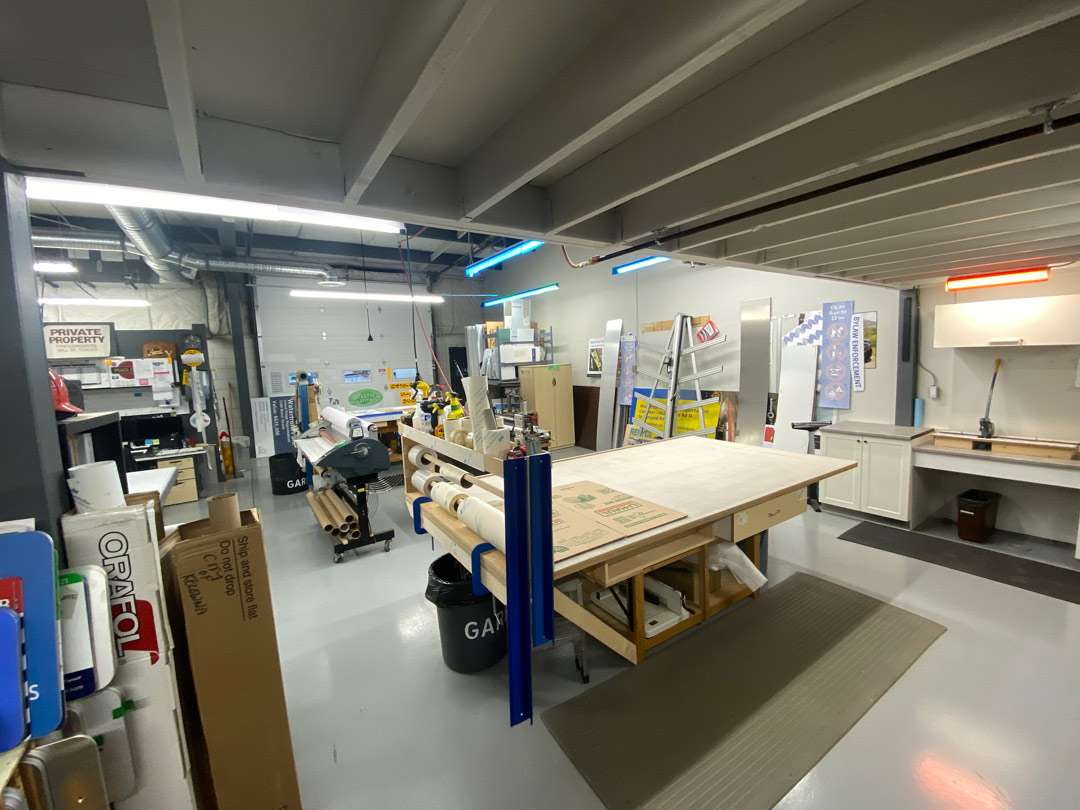
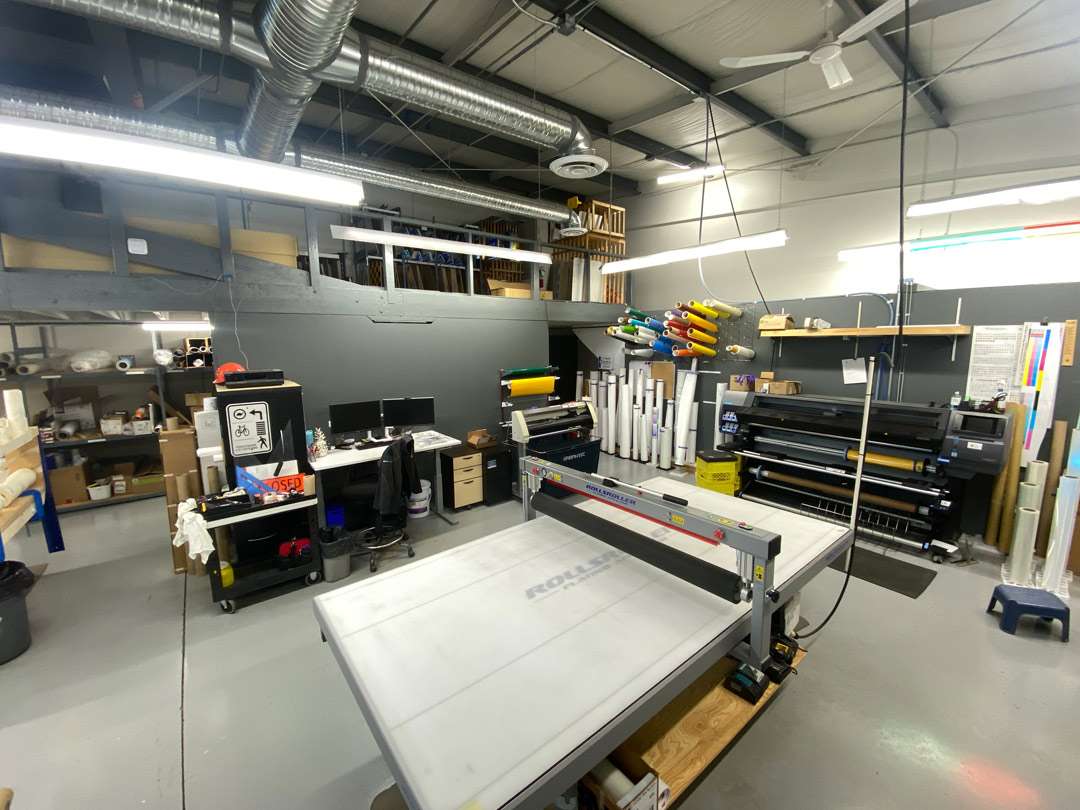
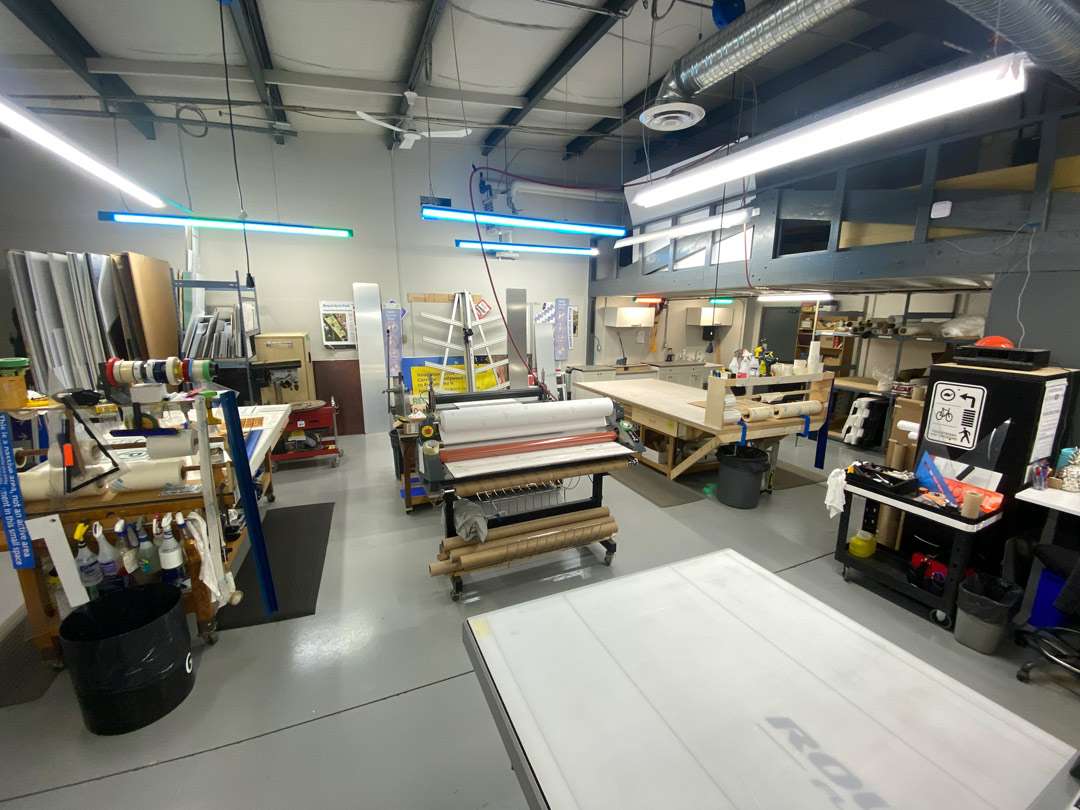
At about 25-by-38-ft., the latest shop is similar in square footage to the old one but is a more efficient space—a rectangle instead of an L-shaped space. Most routine operations are just a few steps away. Even though we’re a municipal sign shop, there are a lot of similarities to a commercial sign shop. Our need to be efficient translates to profitability for a commercial sign shop.
Make a scale floor plan
Having a scale floor plan is a great start. If you can also chalk out where things go in the new shop, that’s even better! If you have customer-facing spaces, washrooms, etc., you have another level of planning to do! (Cue the creative interior designers in your staff!)

Here’s the paper floor plan I made when I laid out the old shop. I cut the elements from sticky notes and colored scraps at ¼-in. equals 1-ft. scale, so that made it easy to drop them into the floor plan of the new shop. After many iterations and input from our carpenters, sign workers and other key users, a usable plan evolved. I think “evolution” is the key word here. Nothing is ever exactly as imagined, but it’s a concrete starting point!
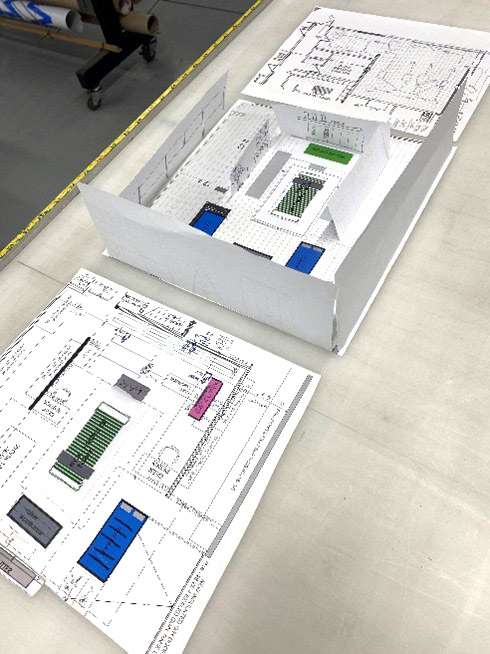
Working in three dimensions, of course, is ideal, but not always possible. But making a small paper box the size of the new floor plan can make a difference. Architects make 3D models for good reason! You can see where shelving might go on a wall, or where a power cord should hang from the ceiling, so it doesn’t cross a walkway, and that kind of thing.
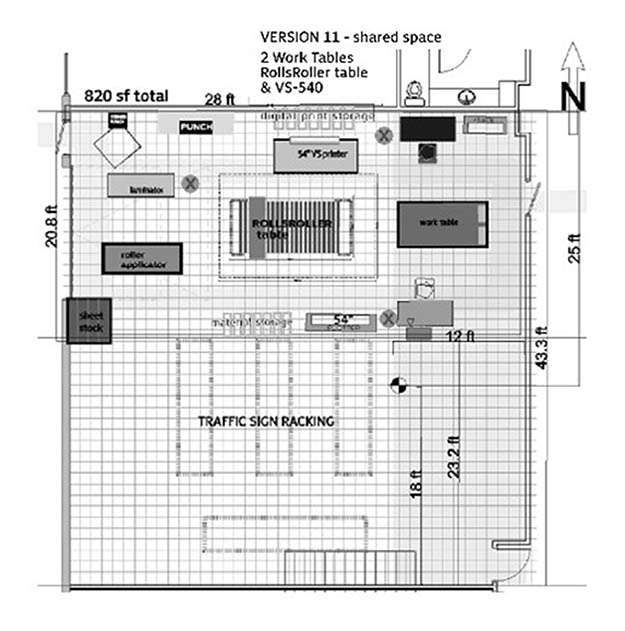
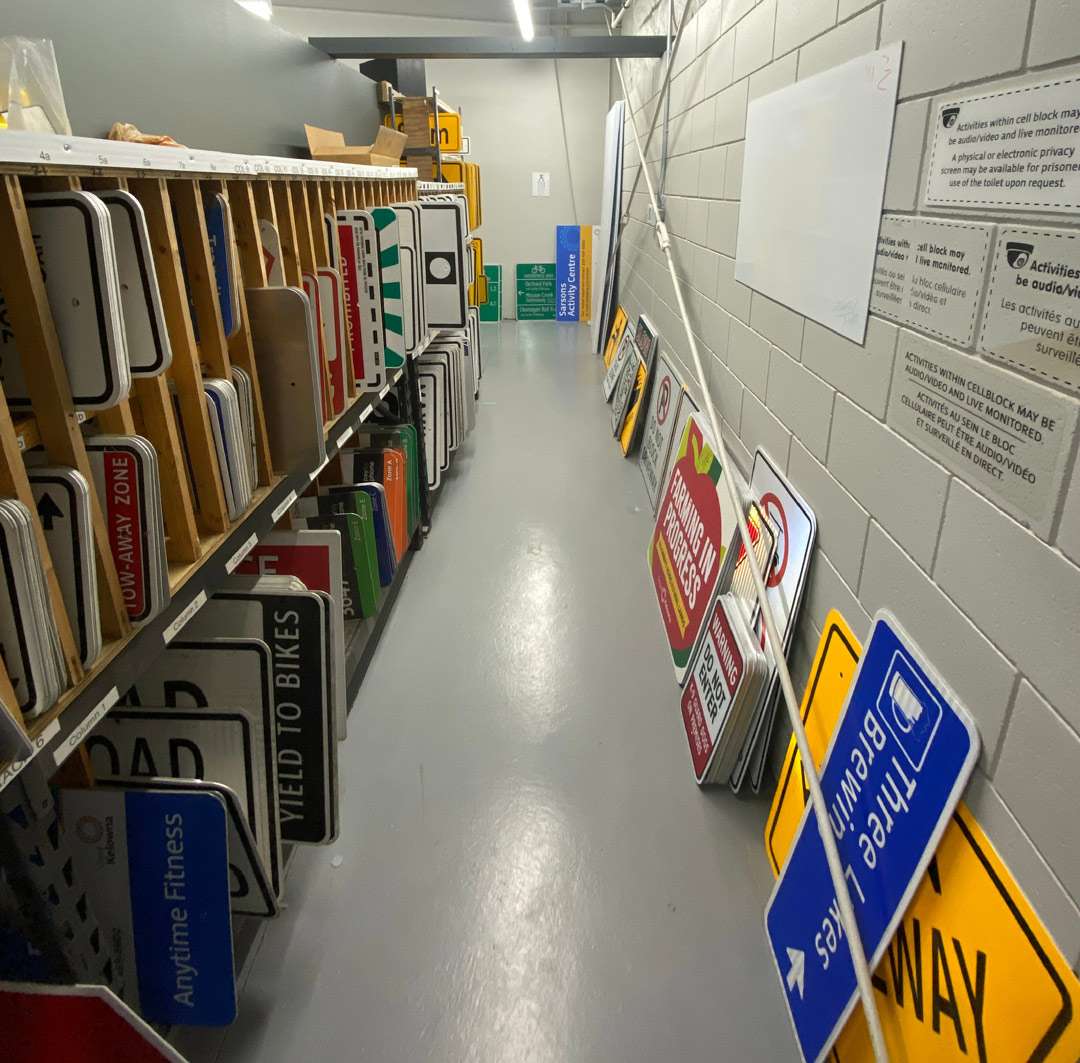
In the new shop, not only was the wall space broken up by overhead doors, halls and huge structural braces, but we were sharing the space with the traffic sign installers who had inventory racking that required a big chunk of space. This early layout tried to keep that racking in place, but it didn’t leave enough room for an efficient shop. So we relocated a bunch of sign stock to a mezzanine, and left the racking in a hallway for the most frequently used small signage.

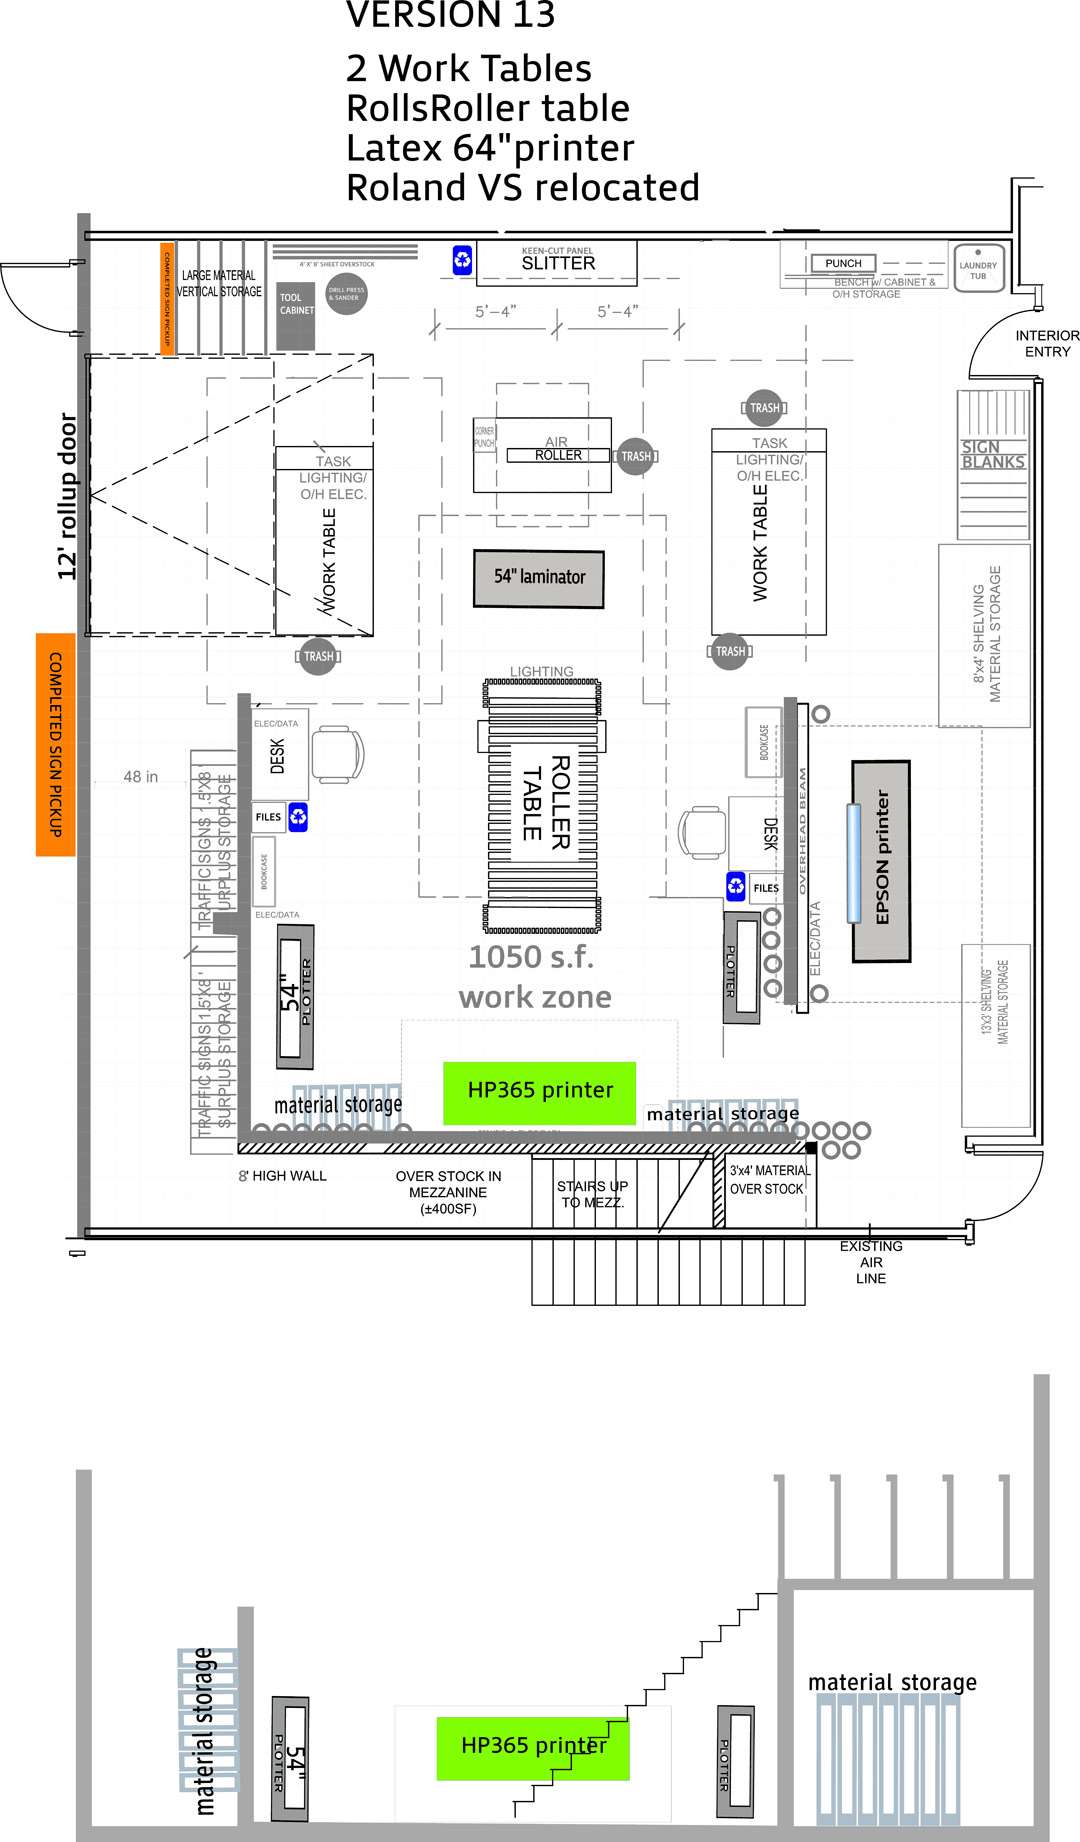
That change gave a much more usable space. Scanning the old shop, I had noticed that there are racks, shelves, roll holders or equipment bolted to almost every square foot of wall space. The solution in the new shop was erecting partitions and creating that valuable wall space while allowing for lots of data and power ports, etc. I did several revisions, refining the layout as I went along.
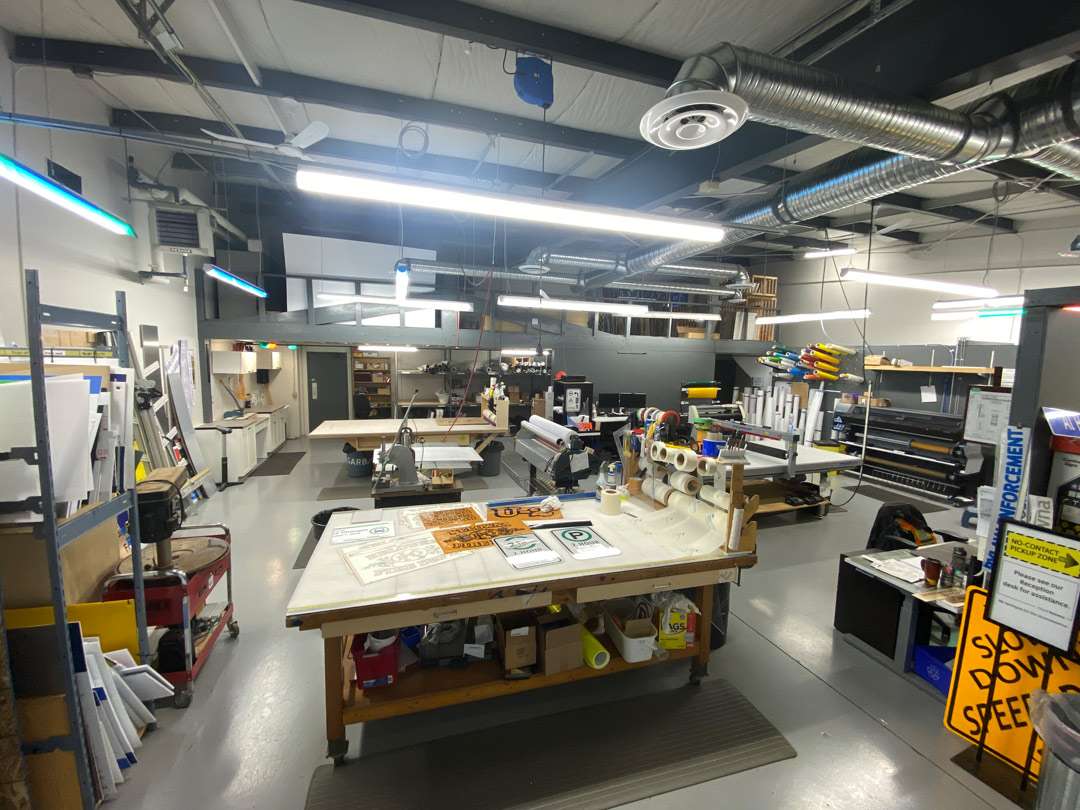
Most of the equipment in the central workspace has power or air line drops from the ceiling. This was great when it came time to fine tune the position, and it was necessary to move things a foot or two. Of course, everything is on wheels, so it’s fairly easy to move equipment.
The actual move!
Luckily, moving the printers only took an hour or so, but if it is going to take longer, you may need to keep them plugged in, or out of the weather at the very least. Otherwise, you may be flushing ink lines, which is always nice to avoid! One surprise was that the bay had been built to house vehicles, so there was quite a slope toward the floor drain. This made it necessary to do considerable equipment leveling.
Here are some of the items that can be easily overlooked when laying out your floor plan:
Equipment working area: Despite what the manual may say, the rear of the printer, or one end of the printer, may be positioned pretty close to a wall, but for service, the printer needs room to roll out for easier access. The front or active feed side may need MORE than the 3 feet that the manual specifies. It takes more space than that when you need to swing a roll on a 7-ft. spindle 180 degrees or unload a full printed roll without bashing into something on its way to the laminator or cutting table! What became evident at our last shop was that 98 % of our work was done on 4x8s or smaller, so the extra width of a 64-in. printer or laminator caused more congestion than it was worth (but it seems the standard has now become 64-in. wide!).

Walkways: These need to be wide enough to allow for carrying rolls or sheet stock. Each piece of equipment also needs maneuvering space around it. Sometimes it can overlap another space, but keep in mind how many workers may be competing for the same area, tools, power, etc.

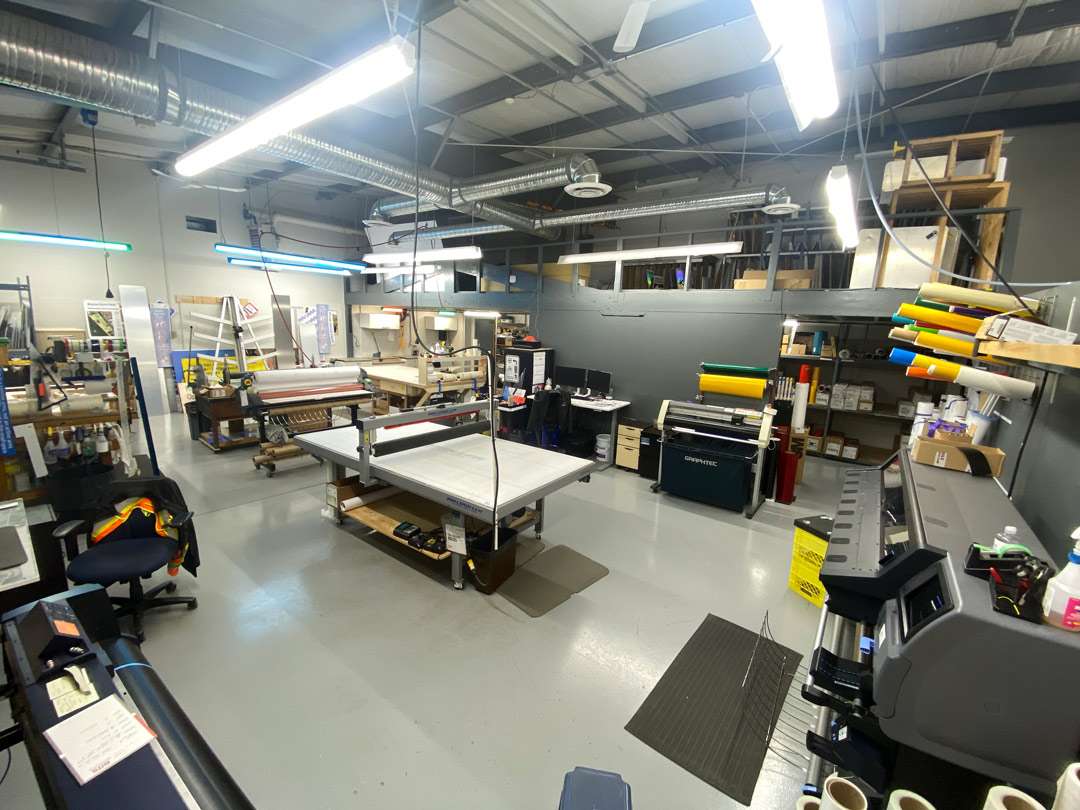
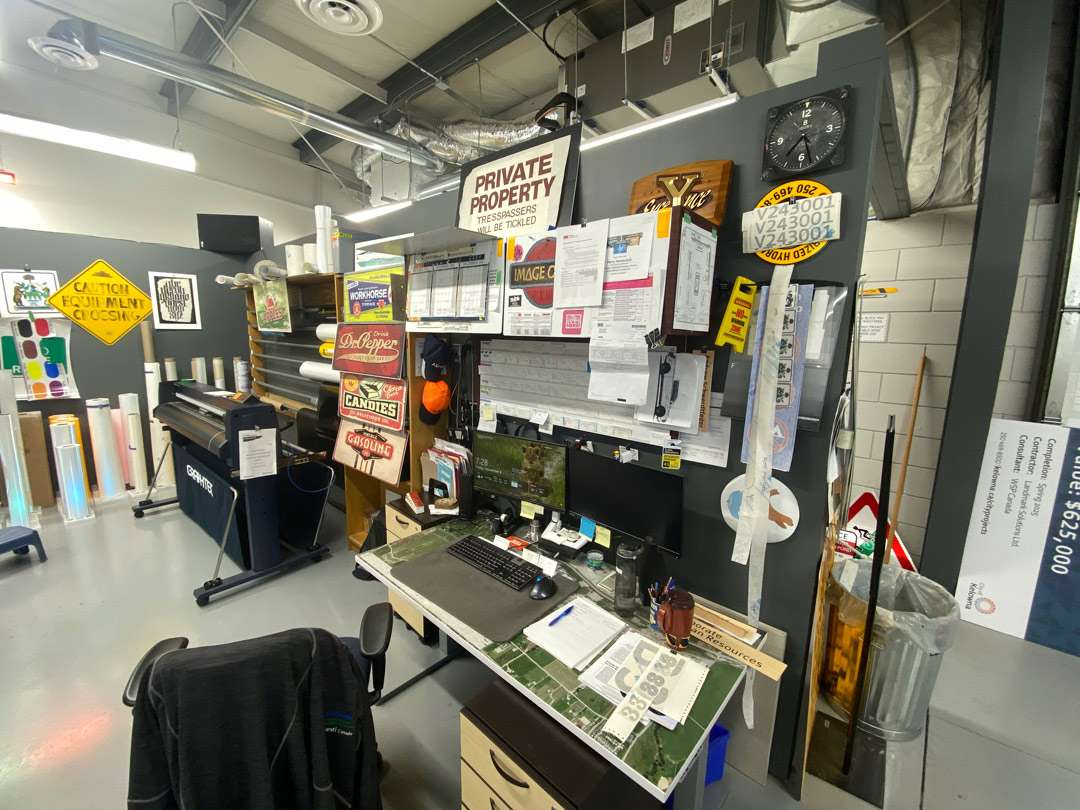
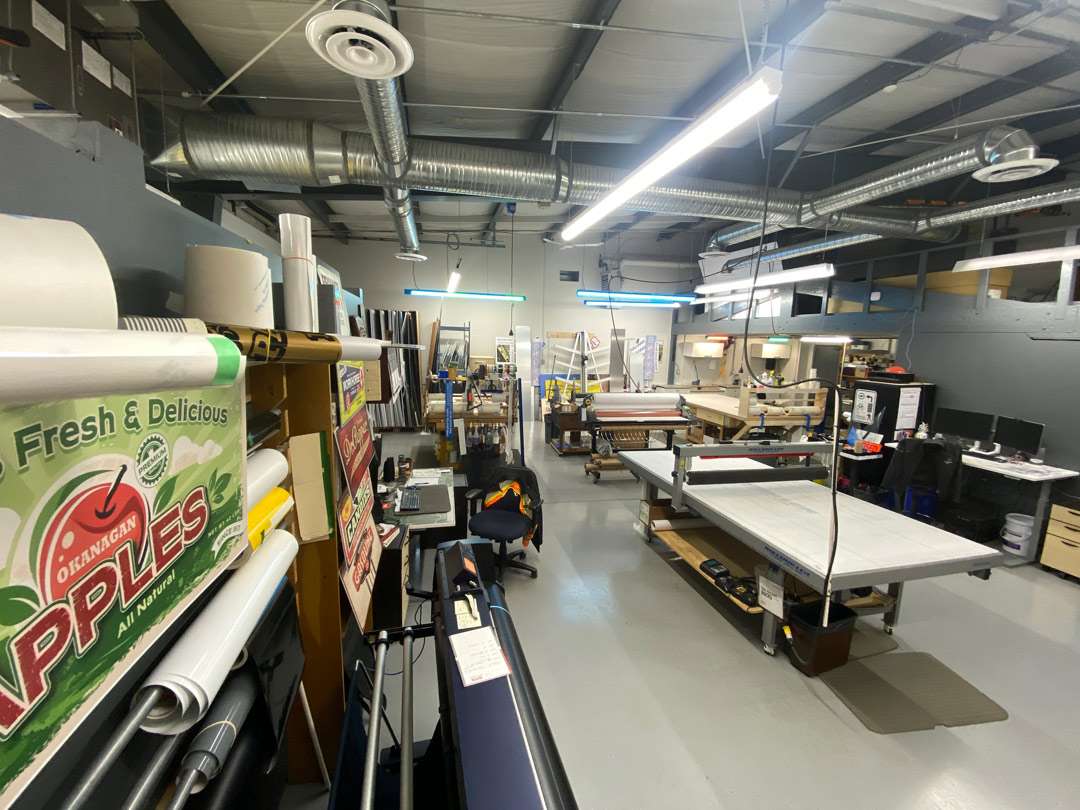
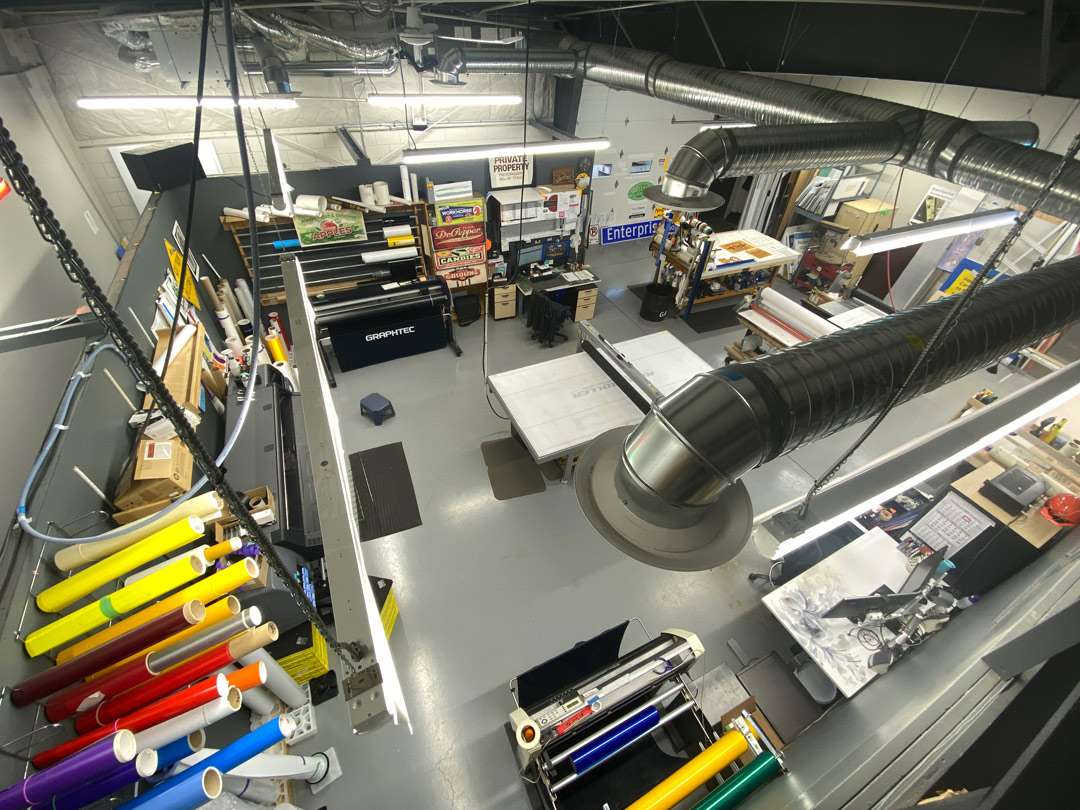
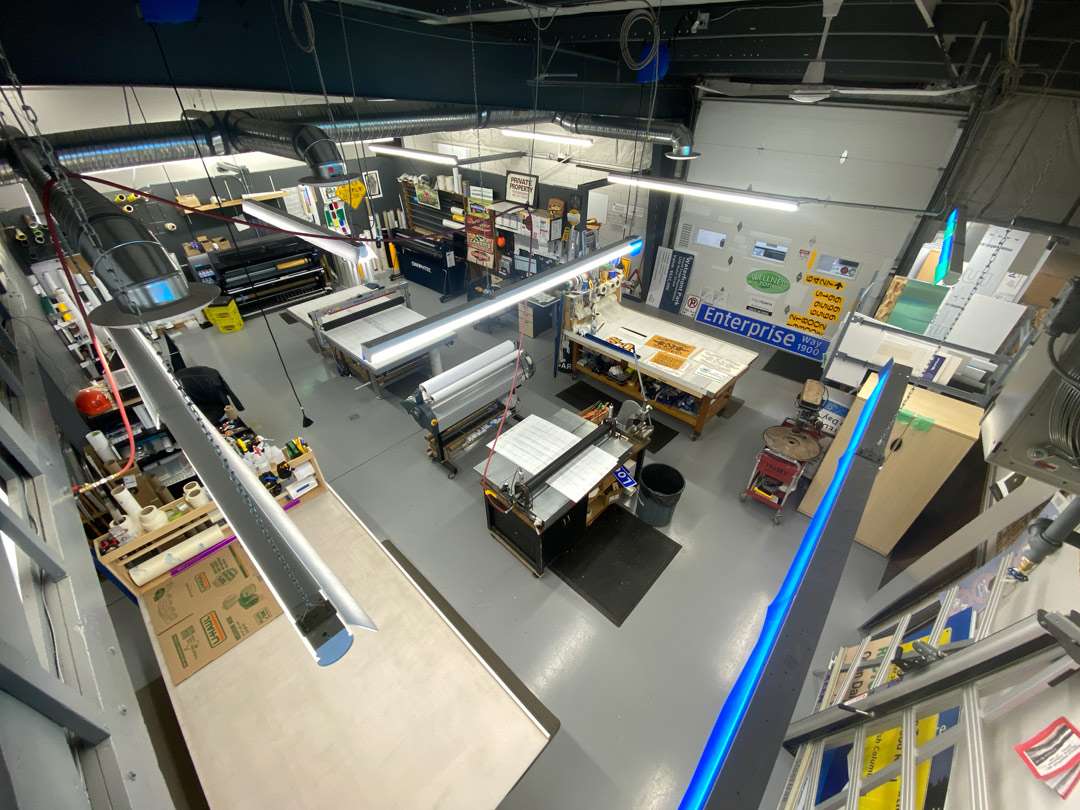
Lighting: I made a huge mistake on this when our electrician asked what I wanted. He intended to hang fixtures similar to the old fluorescents from the 25-ft. ceiling. These were to be 8-ft. LED strips. I said “with some kind of cloud diffuser…” as I’d seen pretty harsh industrial spotlights and wanted to soften that intensity. Yep, I got exactly that. And the side of “the cloud” shines right in your eyes from across the room—unless you can wear sunglasses or a ball cap at all times! In the photos you can see my solution. The blue strips that you see on some of the LED lights are the translucent electrocut vinyl film that we use on highway signs. It reduces the glare from the edges of the lights as you look across the shop.
What I really wanted was an office egg-crate louver. A black louver would result in the least glare. And don’t forget, unless your shop is bathed in natural light, some of those prints coming off the printer are going to look funny under LED or other lighting. One answer is to install full-spectrum lights in a few locations that simulate sunlight more effectively. Some LEDs are even adjustable for color temperature.

Flooring: These you don’t always get to choose. Our concrete is nicely painted grey epoxy paint, which is easy to sweep and mop, but hard on the feet. Lots of rubber mats at every workstation help to ease the pain. Exterior entry points have mats that catch some of the snow, mud and grit during those seasons.
HVAC: Your equipment works best in certain temperature and humidity ranges, and so do your people. Our new heat pump is awesome, but it does run a lot of the time. The ducting overhead is loud and also moves dust around. Radiant heat and some carefully placed exhaust and filtered inlet air would be ideal. The exhaust would get the heat away from the machines and staff during summer, and keep your materials at room temperature during the winter. This, of course, avoids reprints due to ink or paint not adhering properly to cool, damp substrates.
Power, data, air, etc.: Plan for all of those to suit your equipment current needs as well as for possible upgrades. Many printers now use 220V dryers, so you may want to run that line now instead of later.
Trash cans: You’ll want these small and numerous, but never more than a step from a workstation.
Recycling: Make sure these containers are clearly labeled and emptied frequently.
Hazmat, eyewash stations, sharps or flammables: You’ll need a place for all of these and clear signage to identify them. We have a First Aid Station and an Automated External Defibrillator in the hallway, but which way is it? It’s 150 yards away through a long building, so if you’re bleedin’, you’d better be going the right way!
Security: Our shop is of course locked up after hours. There are cameras and a fence around the property, which keep out the “honest” people. During the day, our main access points are secured by swipe card locks. It seems excessive at times, but it’s funny how folks will just “drop by”, find the shop deserted, and just cut up a little corrugated plastic or borrow a chunk of vinyl. Things that go missing can really cost you in lost time, replacement and/or re-dos. In a large organization, it’s also easy to lose track of “who picked up that sign?”
Shipping & Receiving: During fair weather, deliveries can drop a pallet outside the big door, but often materials are more delicate (and expensive) so they need to come inside. Often that ties up one worktable and a lot of floor space while sheet goods are racked and packing slips are verified. Having the tools, gloves, and easy access is important, but coping with the movement of goods is always a challenge. One covered parking stall would ease the congestion in most cases.
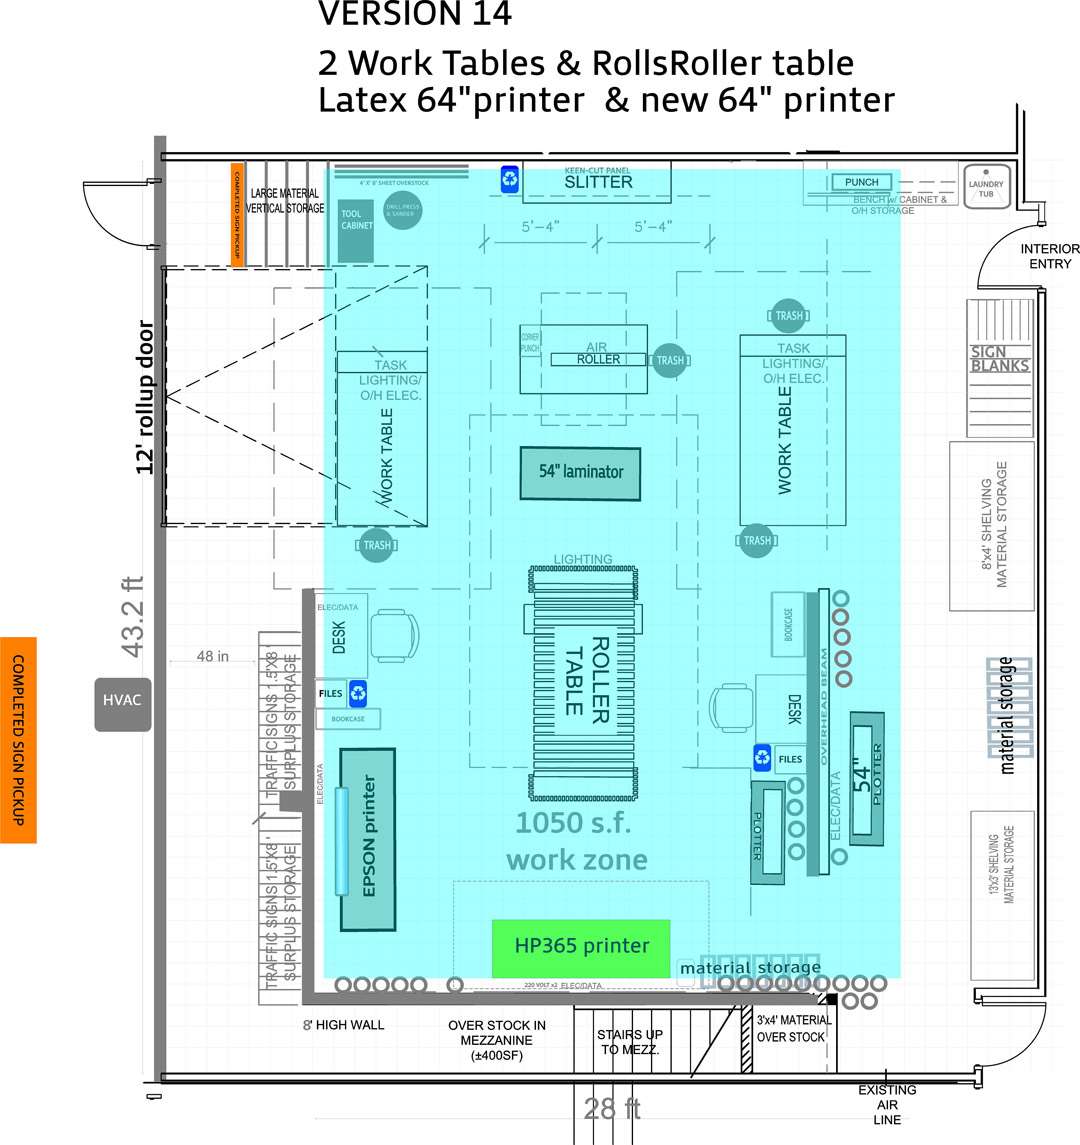
There will come a time when we rehash the layout and make it better, but for now the shop layout is working pretty well.
(Just got the email—our new printer is in stock, and on its way in a few weeks! Yikes—time for version 15!)
Things I’d do differently?
Some 20/20 hindsight….I previously touched on the need to have a spot to drop a 4×8 pallet when receiving sheet goods. That could also include small jobs like electrical cabinets or other small, portable objects. It’s SOOOO much easier and efficient to strip and/or wrap right in your own shop, rather than pack up everything to work elsewhere—even if it’s just to work in another building nearby.
I really miss having a vehicle bay in, or next to, the shop, especially in winter! Okay, I don’t miss mopping the floor afterward!
Handling heavy roll media: Everyone knows what I’m talking about here. At 60-plus pounds, a 54-in. roll is a beast to swing around and get loaded onto many machines. Slips and bumps spoil expensive media and keeping it all clean and organized is another crucial task. I’ve built padded movable platforms to get media into position with minimal risk and strain.
Perry Yaremchuk is a veteran of 42 years in the sign and print industry in Western Canada.