By Dayna Reed
Posted on Sunday, August 31st, 2025

It’s been great that some of my work has found its way to the pages of SignCraft magazine, and more recently, to SignCraft.com. And I’ve enjoyed encouraging and helping other signmakers to move into custom dimensional signs with two instructional videos, “3D Signs Made Easy” and “More Super Cool 3D Signs”. But there’s also the dark, seedy side of the business that lurks beneath the glitz and glamour of making beautiful carved, smalted and gilded signs:
It’s vinyl removal projects like this one.
25 years ago, a business owner stopped by my shop with a box truck and said he was opening a juice processing company. That first job led to 55 semis and 30 tankers. We did vinyl graphics on everything, and the units were going to be replaced every three years.
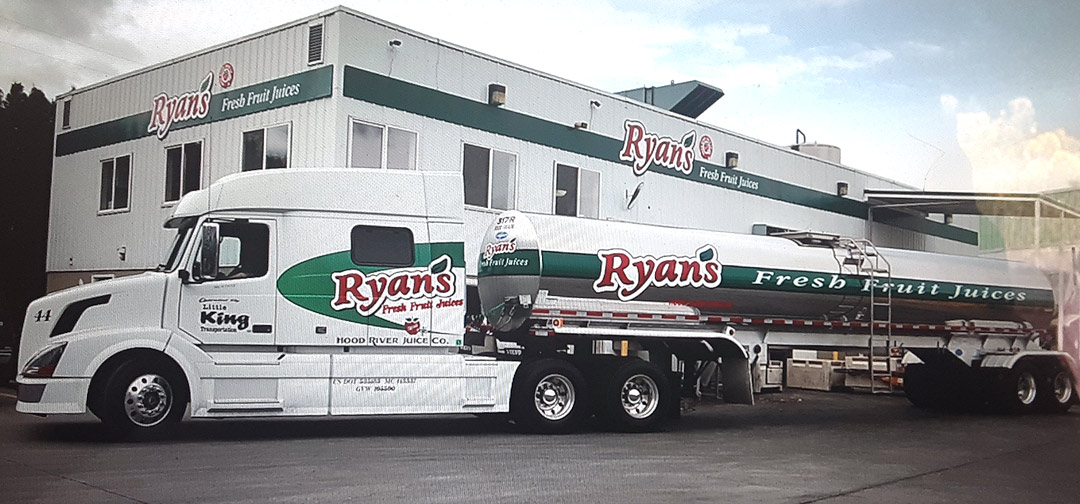
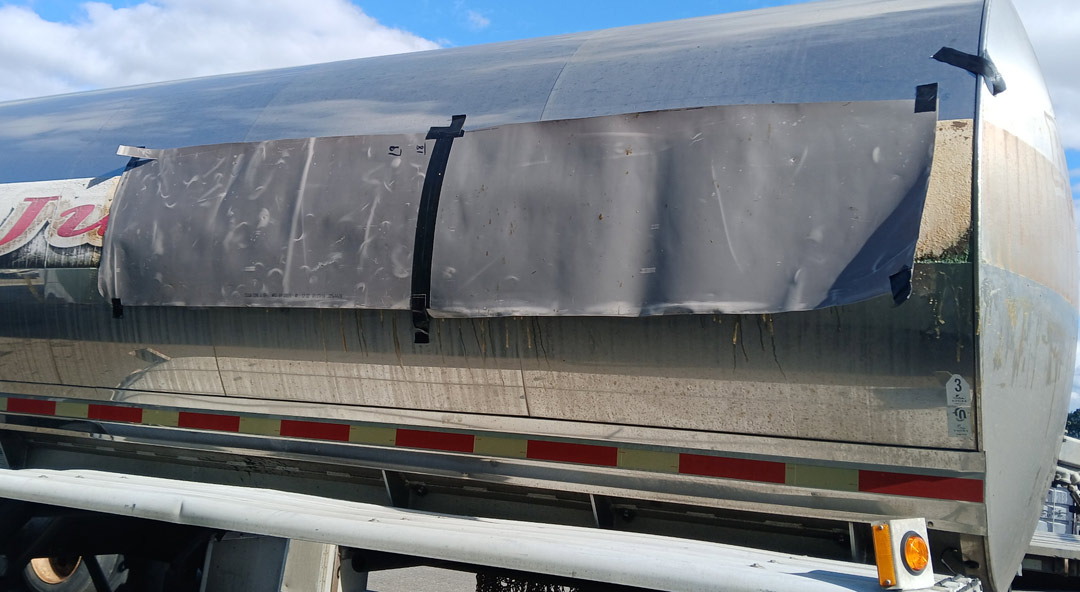
Here’s one of the rigs just after the graphics were completed.
The surface temperature of the tankers can range from minus 16 degrees to 140 degrees. For maximum durability, I used the top-of-the-line vinyl and laminate from a major manufacturer for the graphics. I knew that red would be the first color to fade, so I cut high-performance red reflective film for the red lettering.
Fast forward to today. Thanks to the 2008 recession and the COVID pandemic, all the vehicles stayed in service until 2014 when we began replacing the graphics on the fleet. But now the graphics have been on much of the fleet for over ten years . The vinyl film had gone far beyond its projected lifespan. It was very faded, except for the red reflective, which was in surprisingly good shape. But everything had to come off and be replaced with graphics using a new layout.
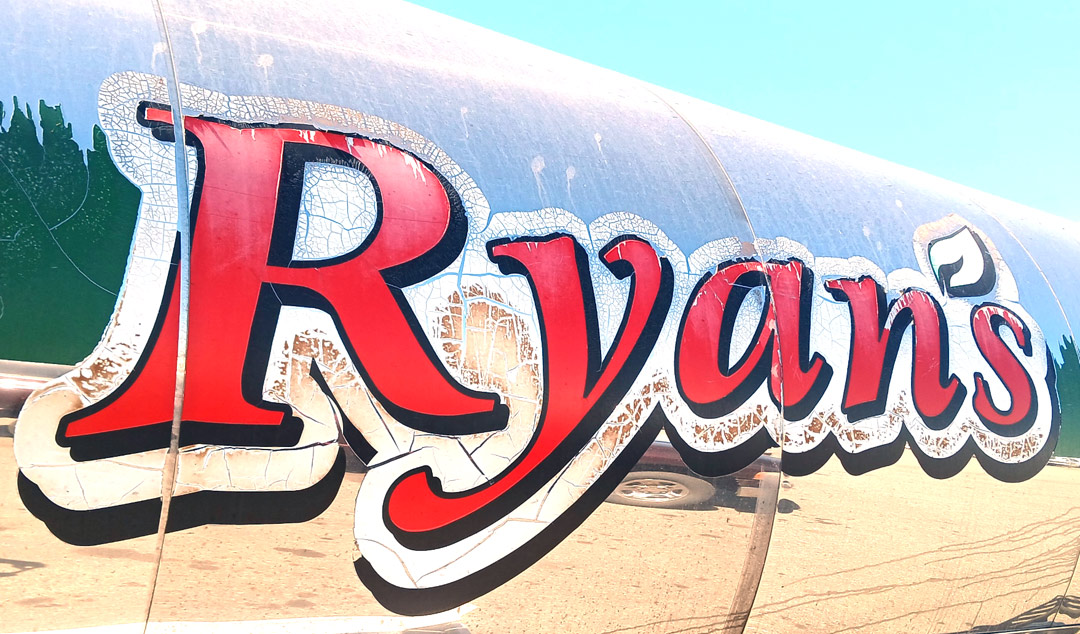
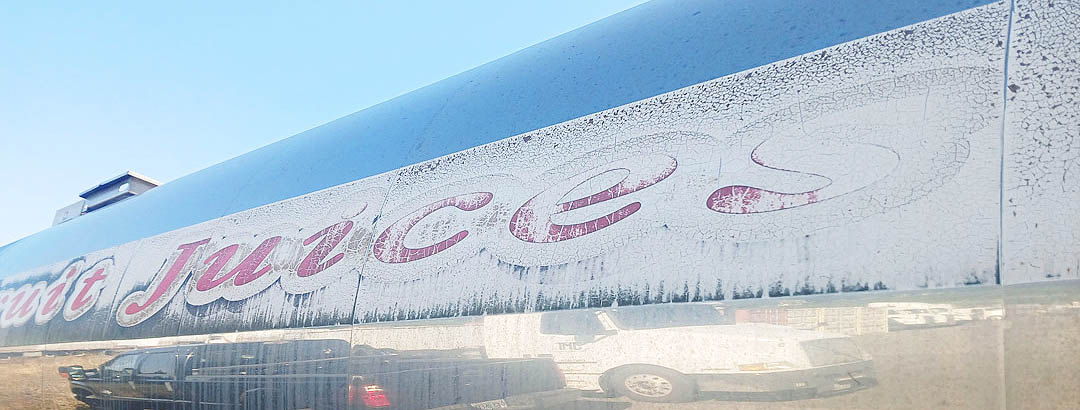
The graphics were showing their age after ten years in use.
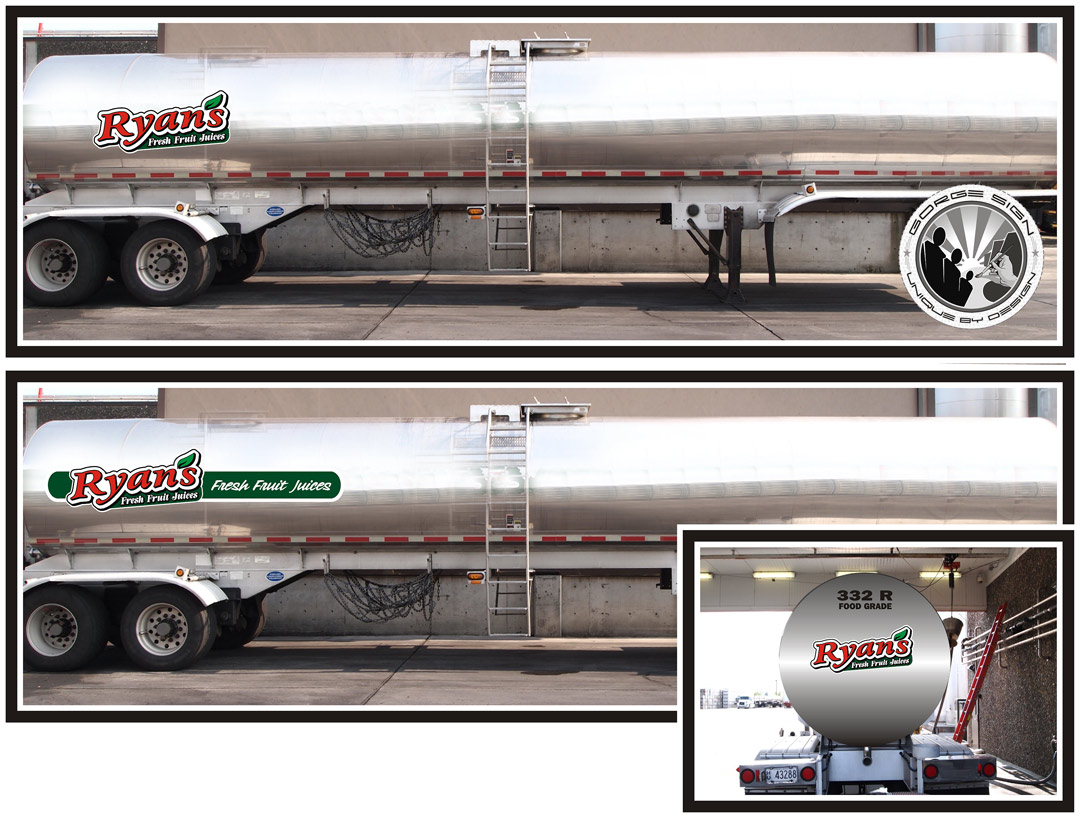
This new layout, shown in this drawing, better protects the graphics during maintenance.
On the new layout, I corrected a design error caused by not understanding the use of the tankers. They are cleaned from the top center using a solution at 220 degrees. Hoses are dragged over the sides of the tankers, which damages the graphics. When refilled with food products, the process again affects the outside of the tankers. The new design takes this into account.
Here’s the method I used on the stainless steel tankers, working one 24-by 48-in. section at a time:
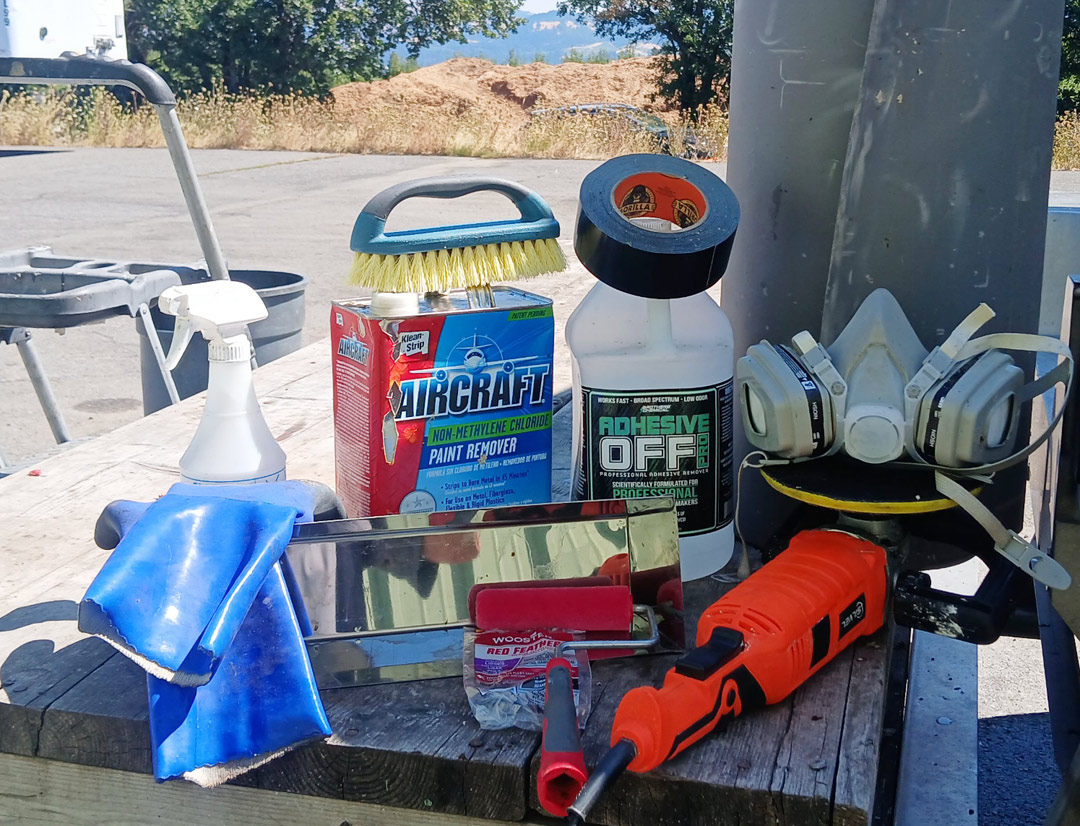
The equipment was pretty basic.
I applied the aircraft paint stripper with a roller.
The mylar sheets kept the stripper from drying too fast.
The stripper softened the vinyl film, but it still required scraping to get it off.
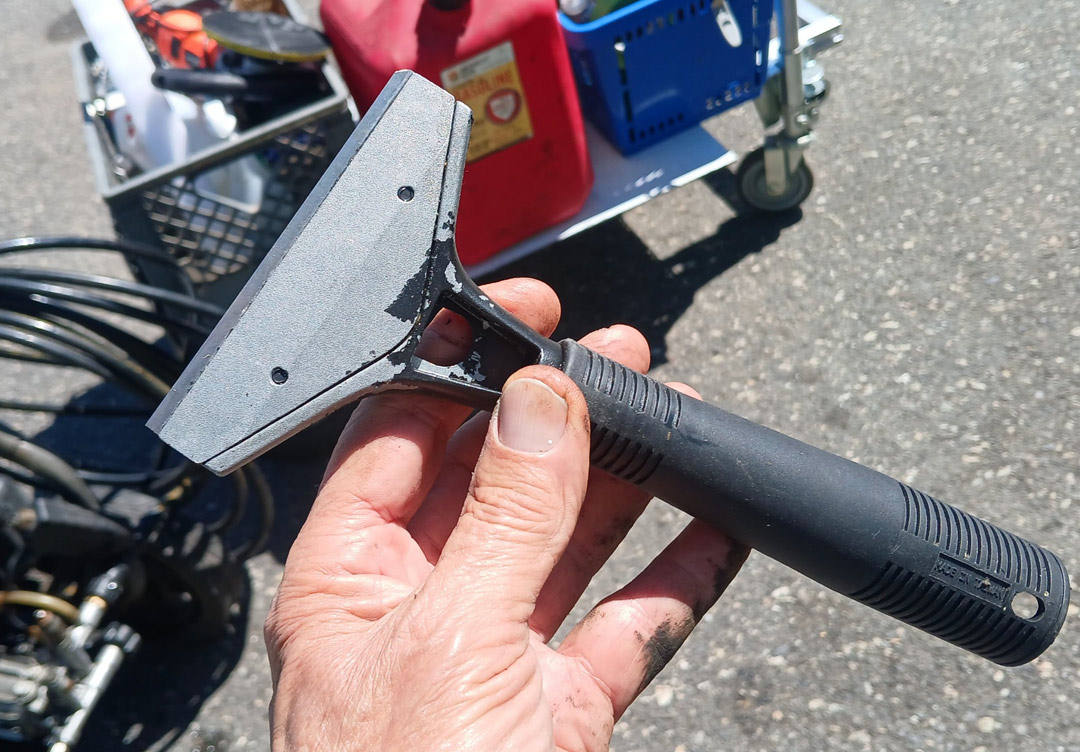
Here’s the scraper that I used.
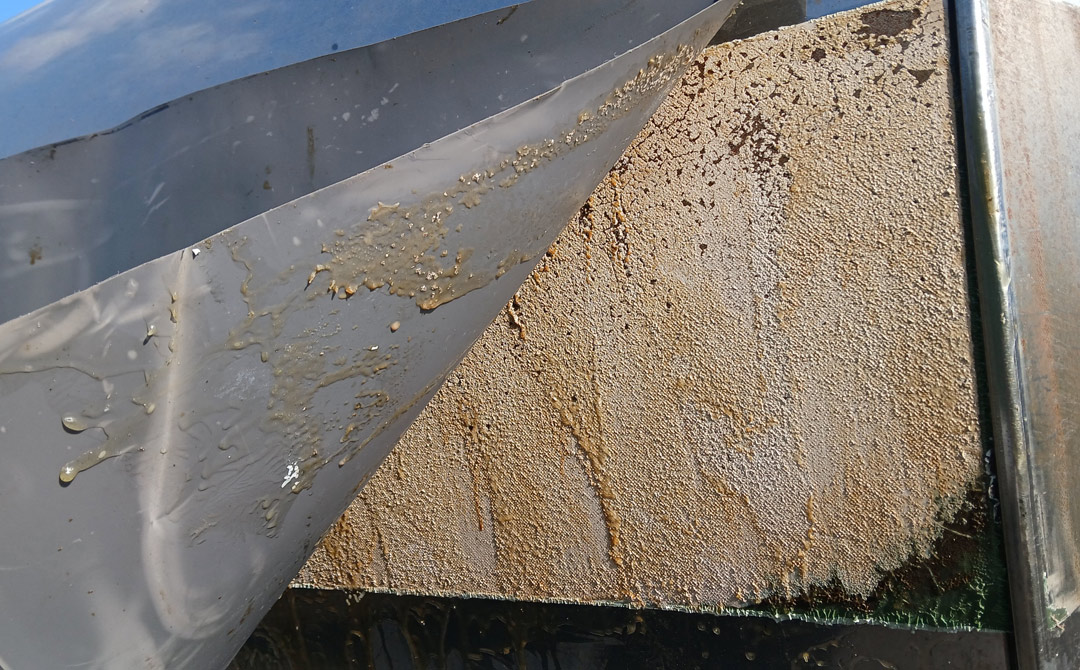
This is how it looked after applying the first coat of stripper and removing the vinyl. I followed with another light coat of stripper, let it stand about 15 minutes, then went over it with the buffer with a scour pad and some household cleanser. I followed with the pressure washer working a very small area at a time.
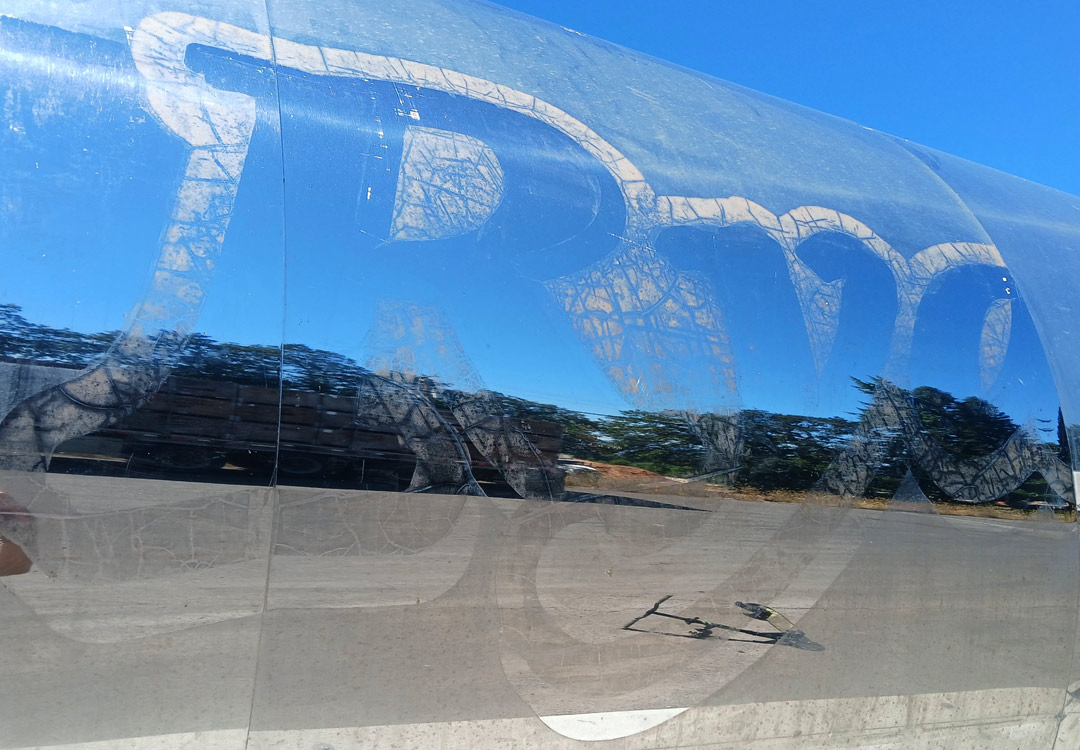
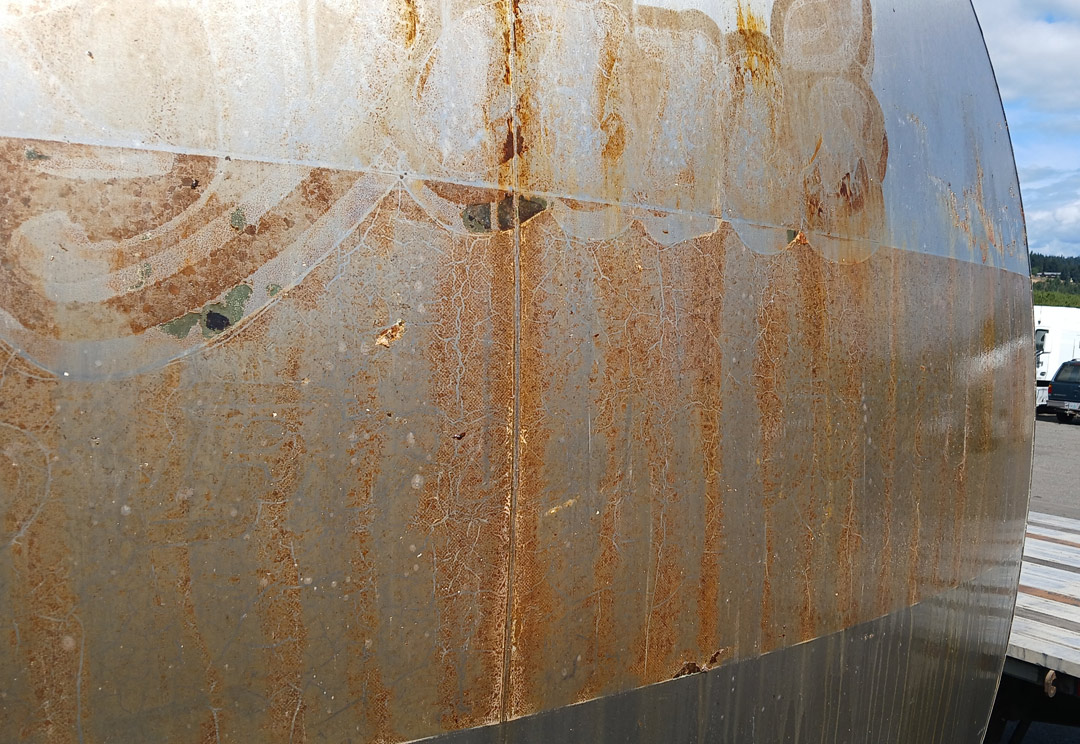
Unfortunately, the ghosts of the vinyl graphics remained on the stainless steel, even after light sanding and buffing.
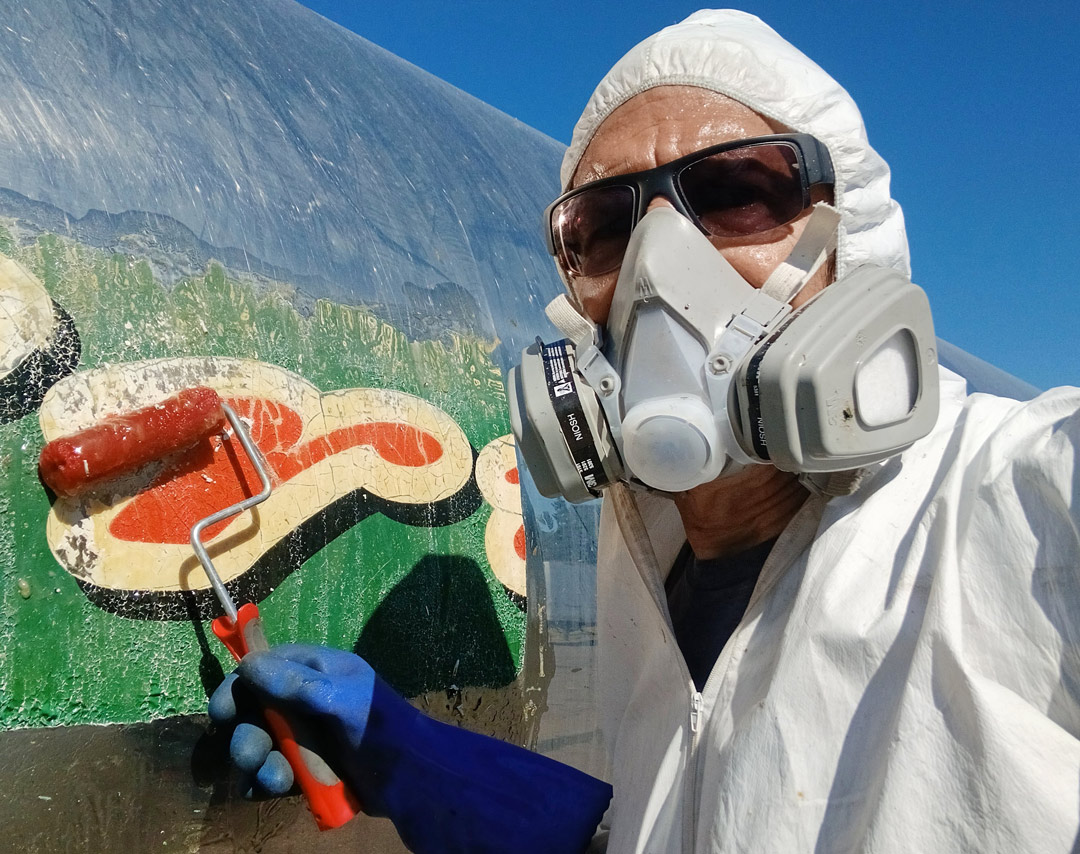
It took me about 16 hours to strip the tanker, working off a wheeled painter’s scaffold. In the end, though, I was still left with ghosts of the graphics in the stainless steel. I could not remove them. First I tried buffing, then I tried sanding with successively finer grades of sandpaper, followed by buffing again. No deal—the ghosts remained.
This ranks as the most miserable sign-related task I have ever had to deal with. It was a 101-degree summer day. The chemicals in the paint stripper were dangerous. I was working in a Hazmat suit and respirator, and it was a slow process.
So the world of sign making isn’t all about the fun stuff. Making beautiful, creative, custom signs is a kick, but in between we sometimes get ourselves into projects like this, which often look easier than they are.
Hey, how hard can it be to remove some old vinyl from a stainless steel tanker, right? Answer: Very, very hard!
If you have successfully removed vinyl graphics from stainless steel and dealt with the ghosting, we’d love to hear how you did it. Please post your comment below. –Editor
Dayna Reed’s shop, Gorge Signs, is in Hood River, Oregon. His two DVDs, 3D Signs Made Easy and More Super Cool 3D Signs, are available at SignCraft.com.
