By signcraft
Posted on Monday, April 20th, 2026

A photo of a great-looking finished sign can be inspiring, but it can’t tell the story behind the design—the decisions about letter styles, colors, illustrations and the like. What materials were used and how was it fabricated?
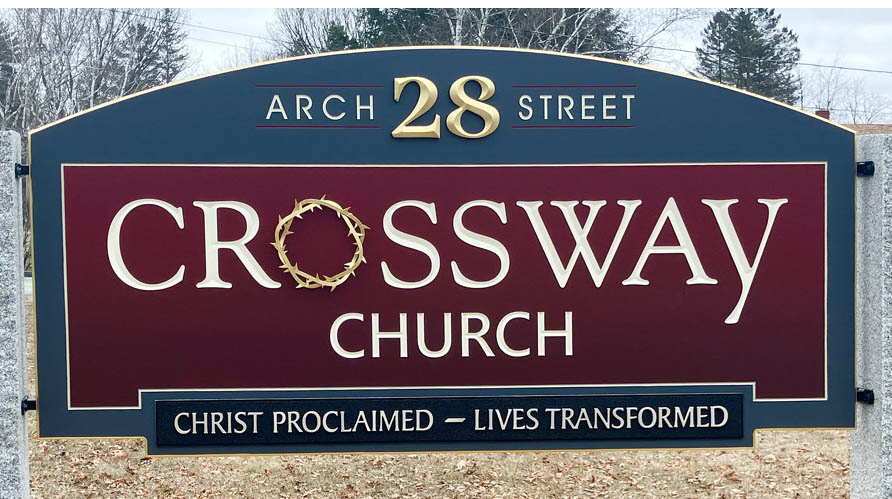
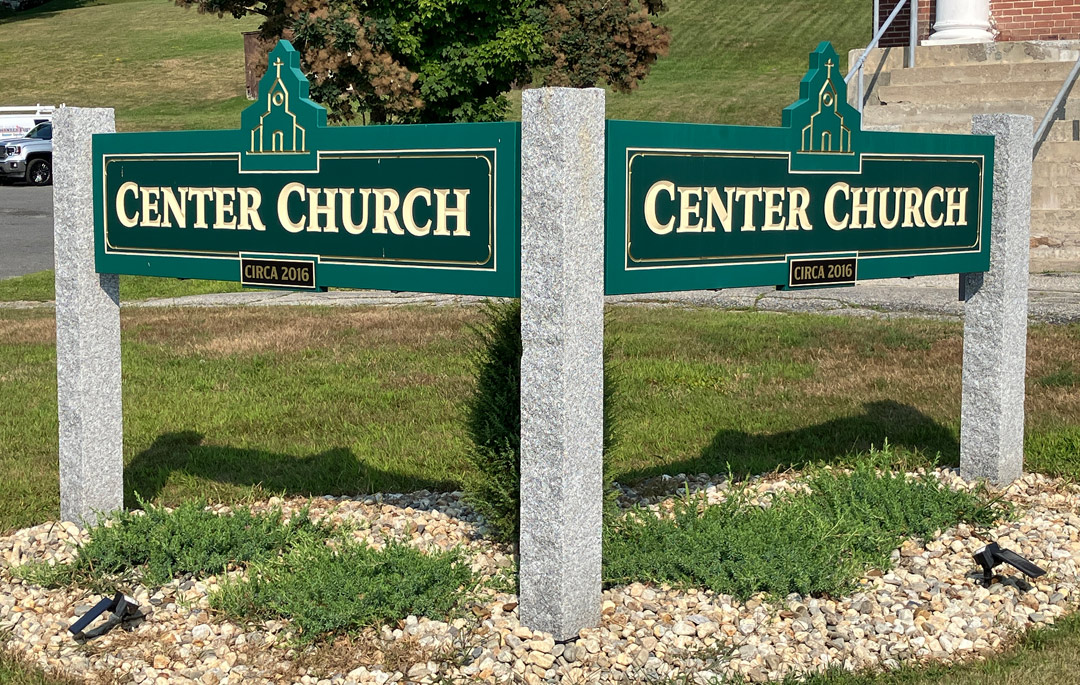
We asked Peter Poanessa, Keene Signworx, Swanzey, New Hampshire, to let us in on that part of these two beautiful church signs. The clean, simple designs are highly legible yet appealing—and very appropriate for the church buildings that they identify. Here’s what Peter told us:
Type choices: “I used Iowan Old Style Black BT for the text on the Center Church sign,” says Peter, “On the Crossroads Church sign, I used a modified Goudy for the main copy, JhengHei for ‘Church,’ Isbell—which is one of my go-to-fonts—for the numerals and Avant Garde Medium for the street name.”
Making the sign panels: “These are both fairly typical signs in my shop. The Center Church sign is on a corner so we used two signs mounted at a 90-degree angle to each other, sharing a common corner post. The 80-by-30-in. faces are 2-in. 18-lb. SignFoam HDU board with incise-carved letters and borders.
“The faces are laminated back to back over a frame of 1-in. square tubing. This gives us steel running all the way through for strength and mounting ability. It also allows us to finish the sign as two single-faced signs, which is easier and faster than dealing with a double-faced sign. We laminate the faces together as the last step and use epoxy for that.
“The Crossway Church sign is a 85-by-42-in. double-faced sign. It’s also on 2-in. 18-lb. HDU board with incise-carved letters and borders.
“On both of these, we cut the panels to shape then routed the outermost border on the raw HDU. Then we prefinished the panel before routing the graphics. We painted the routed border, then the main background color and the border. When everything was dry, we masked the panel and put it back in the router to carve the rest of the graphics.
“Once the carving and finishing is done, the final step is pulling the mask off. This method saves time and gives very professional results. But it is also a little risky. If your paint layers are not put down well, the background paint may lift when you remove the mask—which is a real disaster. The key is to make sure everything is completely dust-free between each paint layer.
Installation: “The 1-in. steel tubing that is bolted to the granite posts. HDU board is a great material but it doesn’t have much structural strength. I make sure it is well supported.
Finishes: “Both signs were finished with Sherwin-Williams Emerald line of water-based acrylic urethane. We finished the steel brackets with Krylon Hammered Finish spray paint. For gold size we have been using Dux brand slow size.”
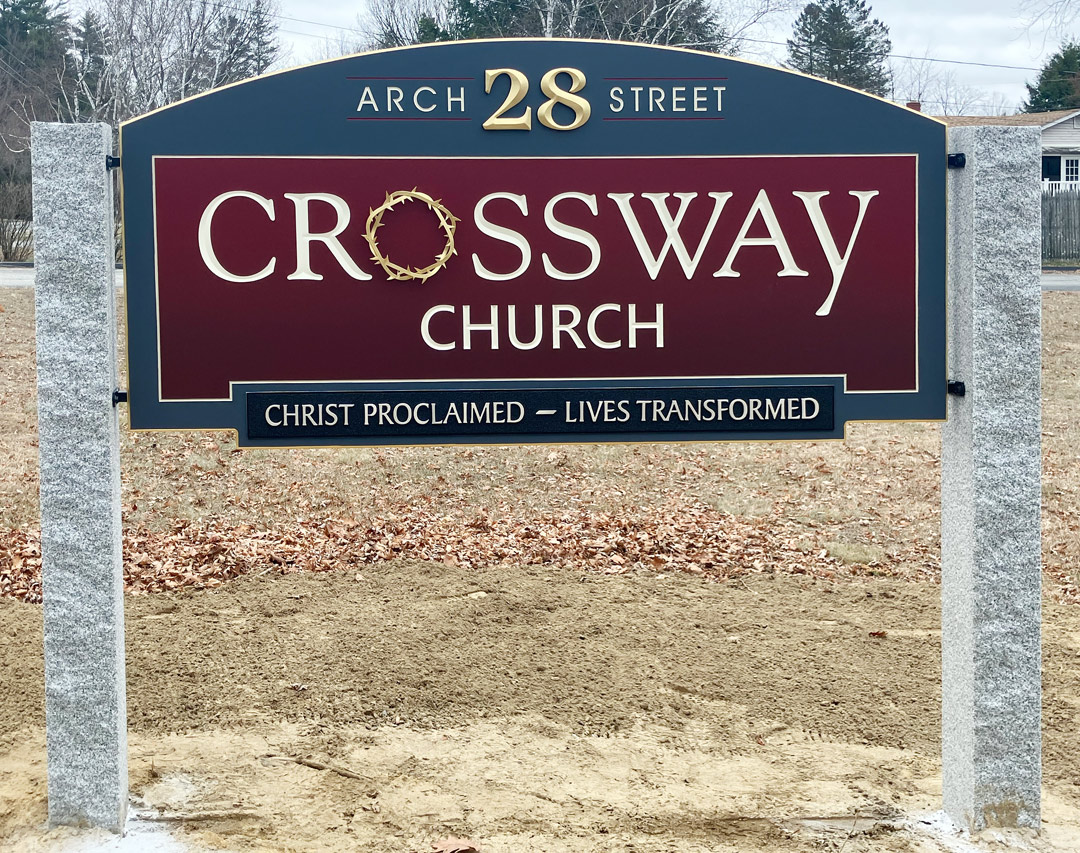
Crown of thorns: “The crown of thorns graphic on Crossway Church was waterjet cut from .100-in. steel by a local metal shop from my design file. Bending the thorns was easy, thanks to a couple pairs of Vice-Grips.” [See how Peter does that in “Metal sculpture graphics are easy—and look great!” –Editor]
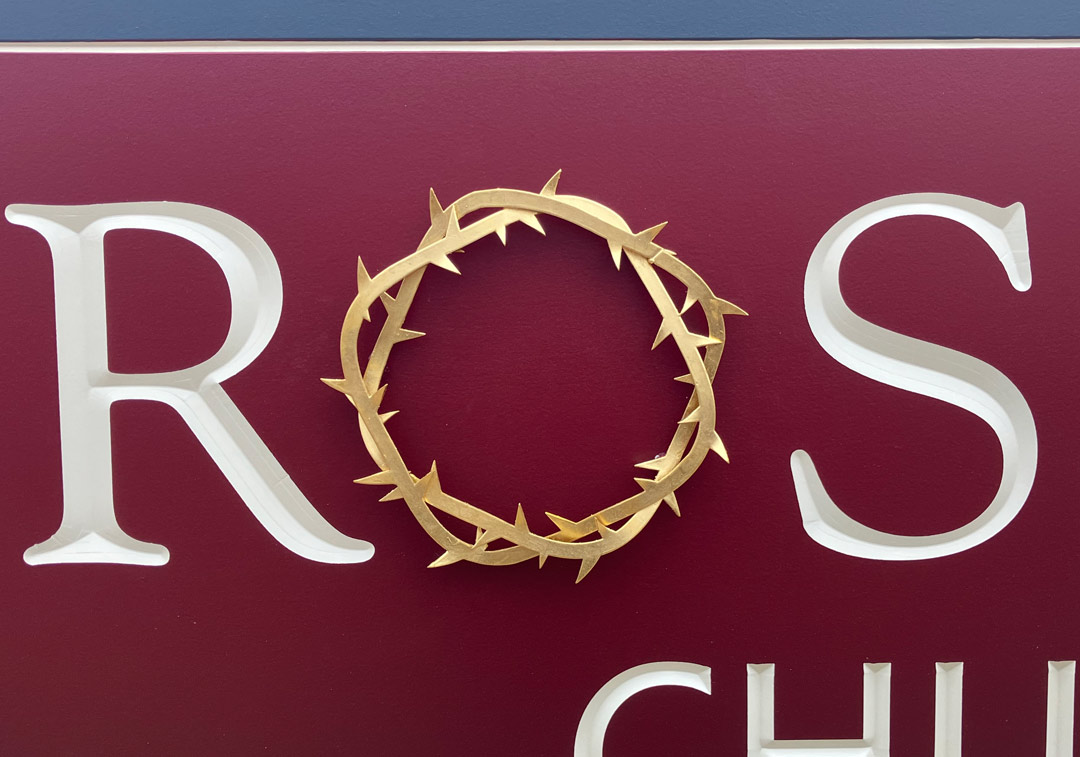
A touch of gold: “On the Center Sign, the top graphic, ‘Circa 2016’, and the inner border are finished with gold leaf. The lettering is painted. On Crossway Church, the street number, outer cove border and the crown of thorns were gilded.
“I’m careful about using gold leaf on the primary copy. It works well sometimes—gold letters on a black smalt background is just about guaranteed to work. But at times, gold leaf in a convex letter can appear almost black and that affects legibility.
“These signs are about 75 feet off the road and they wanted them to be very legible. White or off white is much more legible than gold leaf would be on the dark green background. Gold leaf worked great for the embellishments, like the inner border and church graphic in this case and adds a nice touch.”
The posts: “We like using granite posts since granite is readily available here, but they could just as well have been wood. The granite really upgrades the look of the sign and adds a sense of permanence.
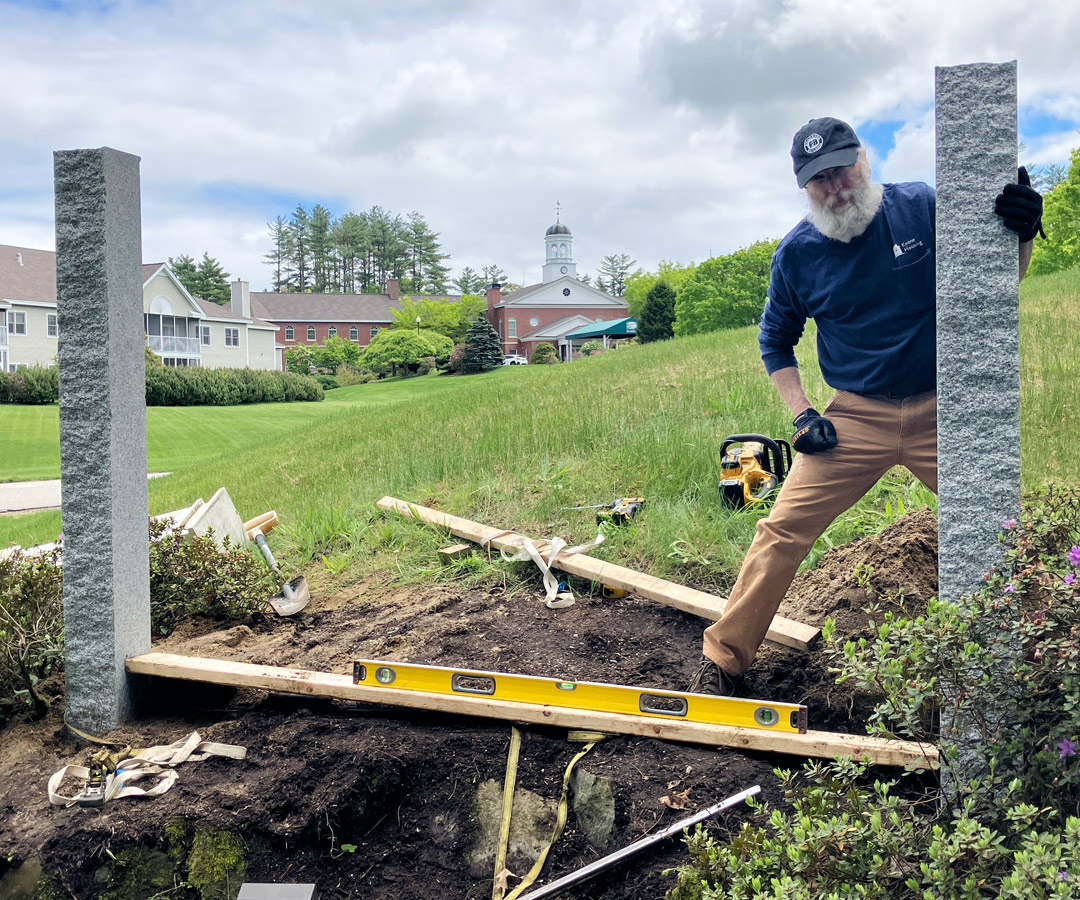
“We usually either set the granite posts ourselves or work with the granite company if they are too heavy for our bucket truck. We cut spreaders from 2X4s, then set, plumb and backfill one post. We set the other post in the ground then place one spreader at ground level and one up near the top. We ratchet strap the posts together then backfill and compact post number two. To fasten the horizontal tubular steel to the granite, we use ½-in. lead shields with 5/16-by-2-in. galvanized lag bolts.”